
100 Days of Mischief Managed

The boys and I have been reading the Harry Potter series together. Our youngest is HOOKED! When I asked Jonah what he wanted on his 100th Day of School shirt, he emphatically requested anything HP. Here’s my take on the popular 100 Days of Mischief Managed design currently spotlighting on Pinterest.

Materials

Step 1: Create the layout in Cricut Design Space
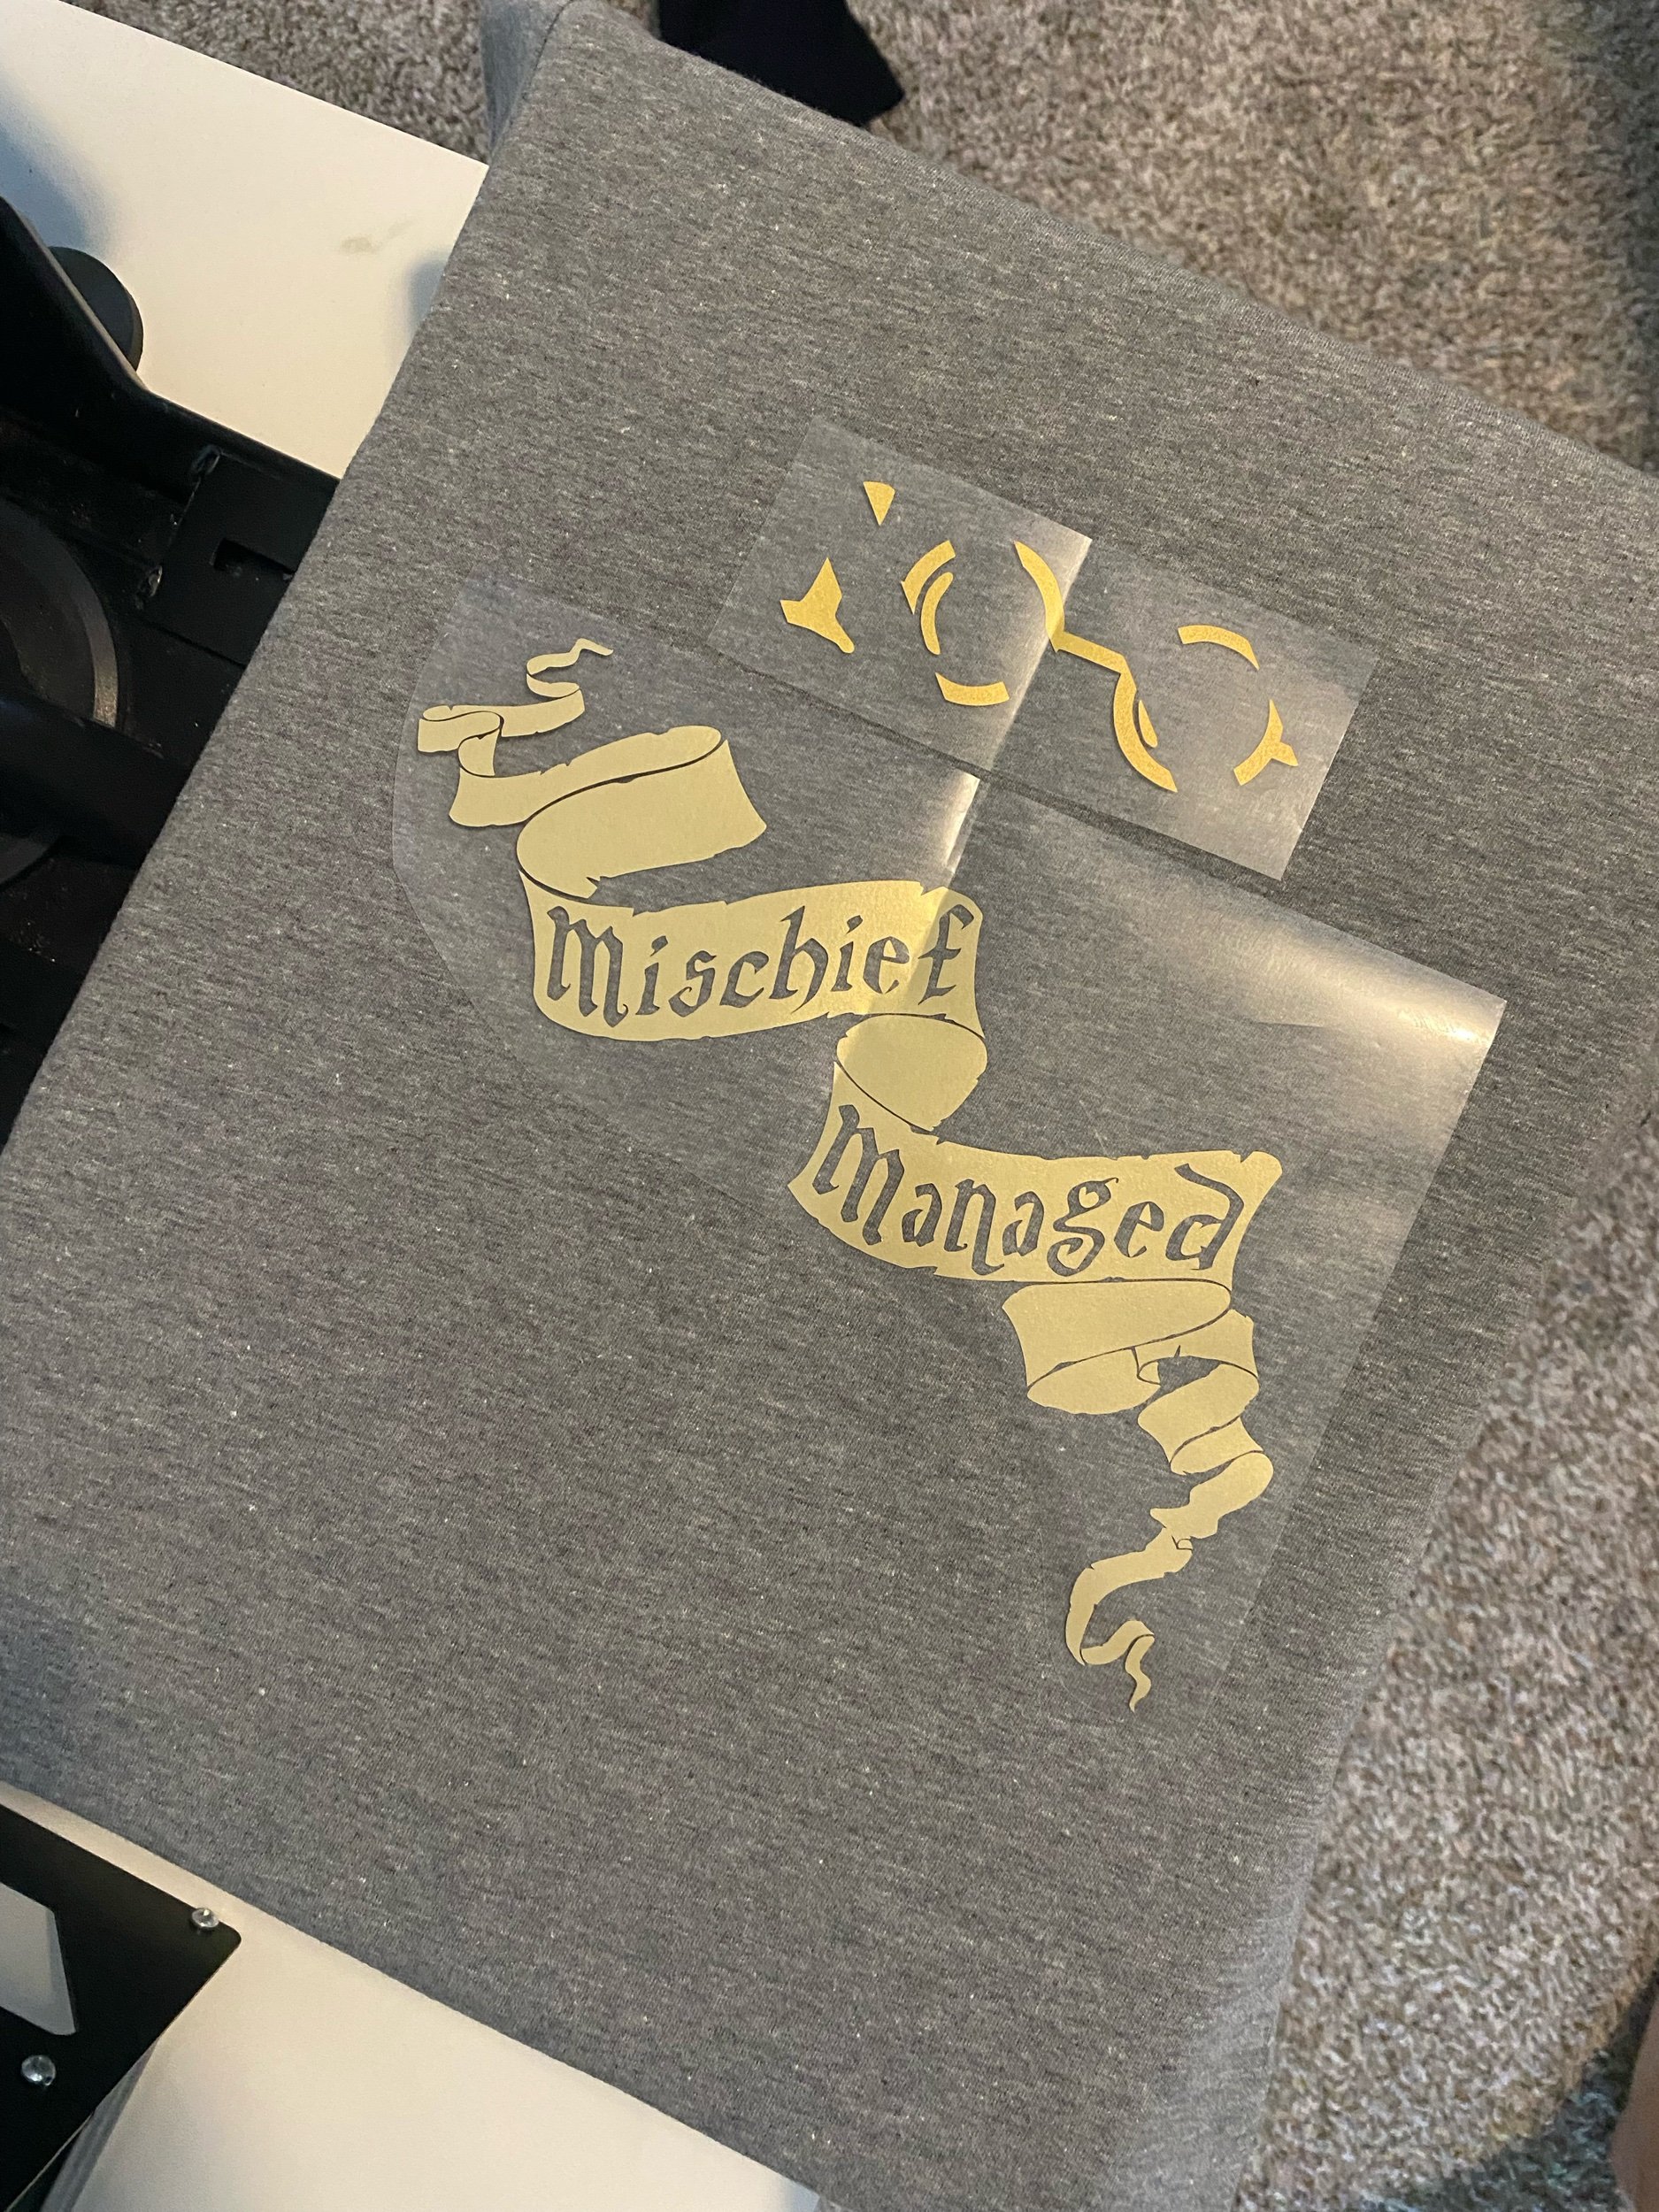
I began by uploading the HP glasses and lightning scar image and a Mischief Managed banner to Cricut Design Space. Then, I found the footprints and kept adding them until I had a total of 100.
I’ve made the design public. If you have a Cricut, feel free to use this link.

Step 2: Cut the Heat Transfer Vinyl (HTV)
Don’t forget to mirror your image in the settings before beginning your cut. Carefully weed out the negative parts of the design. Then, layer the different colors until you’ve recreated the design with vinyl.
Fold the design so that the glossy, non-sticky sides are touching. This middle line will be used to align the vinyl on the shirt during the next step.

Step 3: Pressing the HTV onto the Shirt
Preheat the Heat Press to 325 degrees Fahrenheit. Then, fold the shirt in half vertically. Press for 5 - 10 seconds. This will create a middle crease down the front of the shirt.
Now, line up the vinyl so that the creases (the one you folded into the plastic transfer sheet and the one you just pressed into the shirt) match up. Begin removing the top layers of vinyl until there is only 1 layer of vinyl on the shirt. (Make sure there are no corners or edges overlapping. You don’t want to press vinyl on top of another transfer sheet.)
Close the Heat Press for 15 seconds. (If your HTV is cold-peel, wait to remove the transfer sheet. Check the packaging the HTV came in to determine if it’s cold-peel or not.) If you have a Teflon sheet, you can discard the transfer sheet once you remove it. If not, keep the transfer sheet so you can protect the vinyl you’ve already pressed.
Continue adding one layer of HTV back and pressing for 15 seconds. Make sure you’ve used either the transfer or Teflon sheet to protect the HTV already adhered to the shirt.


Finally, cut out the remaining footprints and place them around the collar, sleeve, and bottom of the shirt.

Check out “Creepin’ It Real for 100 Days” shirt, too.