
Elf Holiday Door
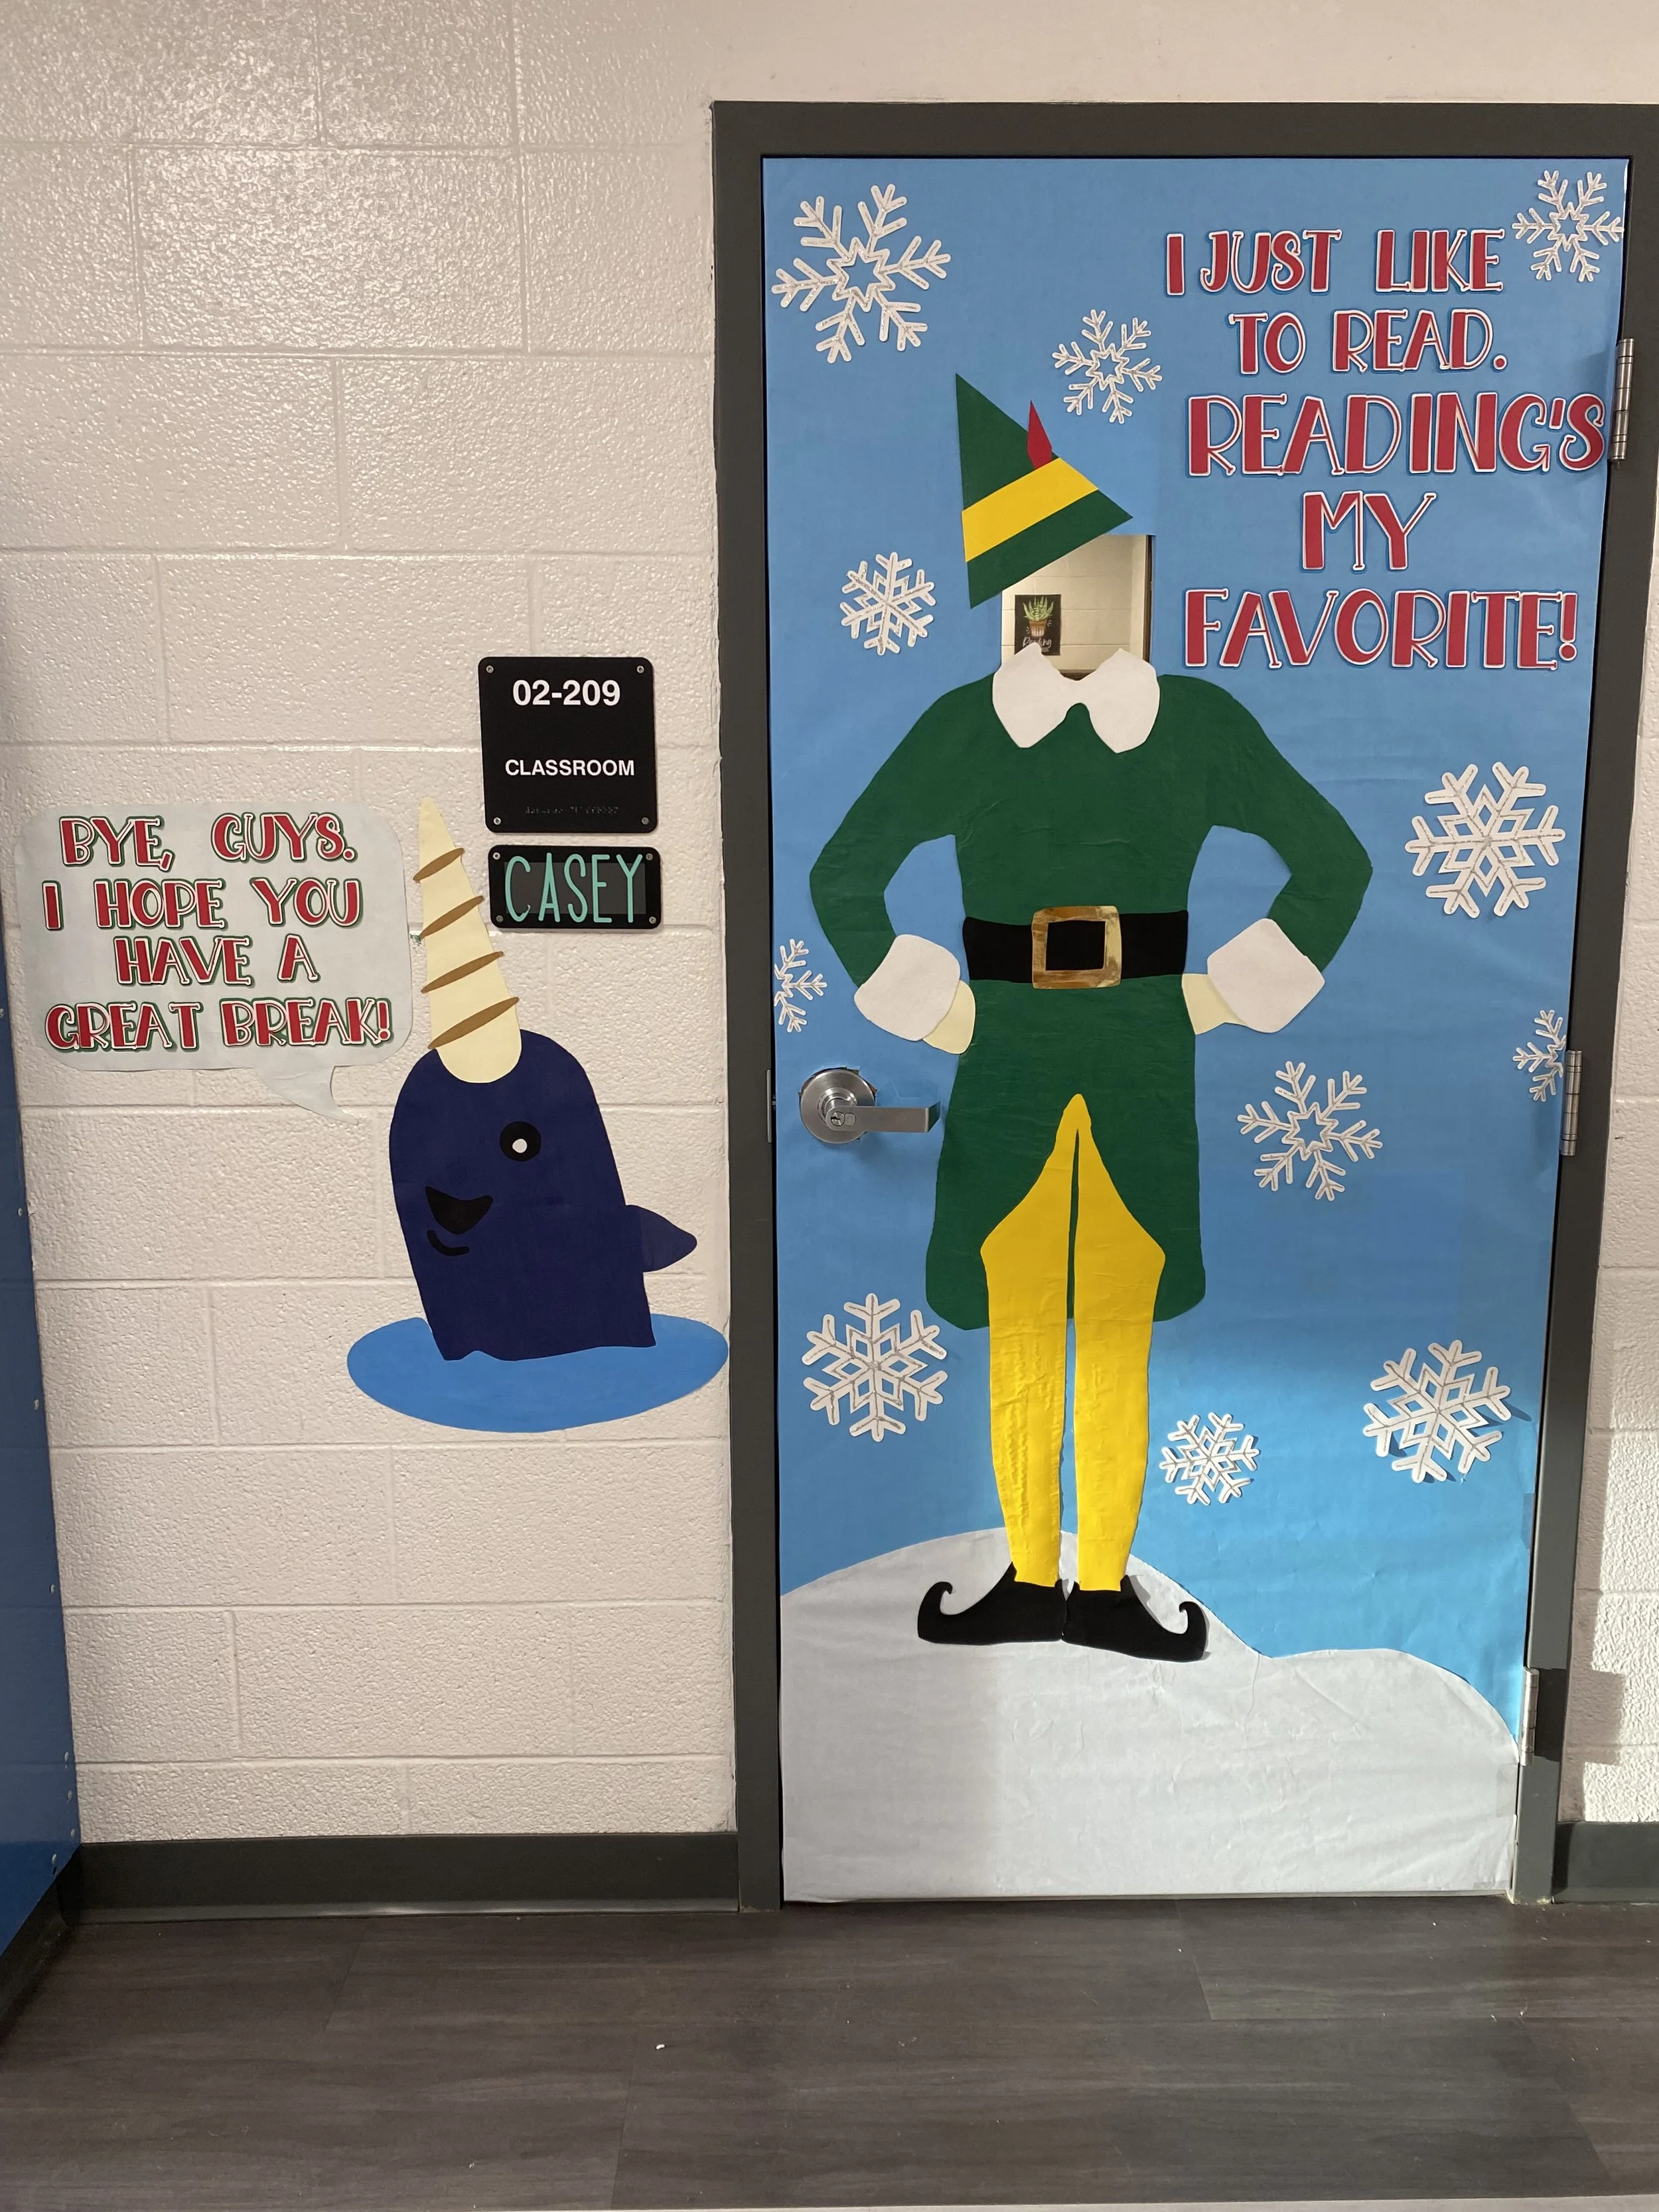
For the last week of the first semester, my school hosted a holiday door decorating contest. Being a fan, I knew I wanted an Elf inspired door and wanted it to say, “I love to read. Reading’s my favorite.” Here’s how I put together my display…
Digital Design
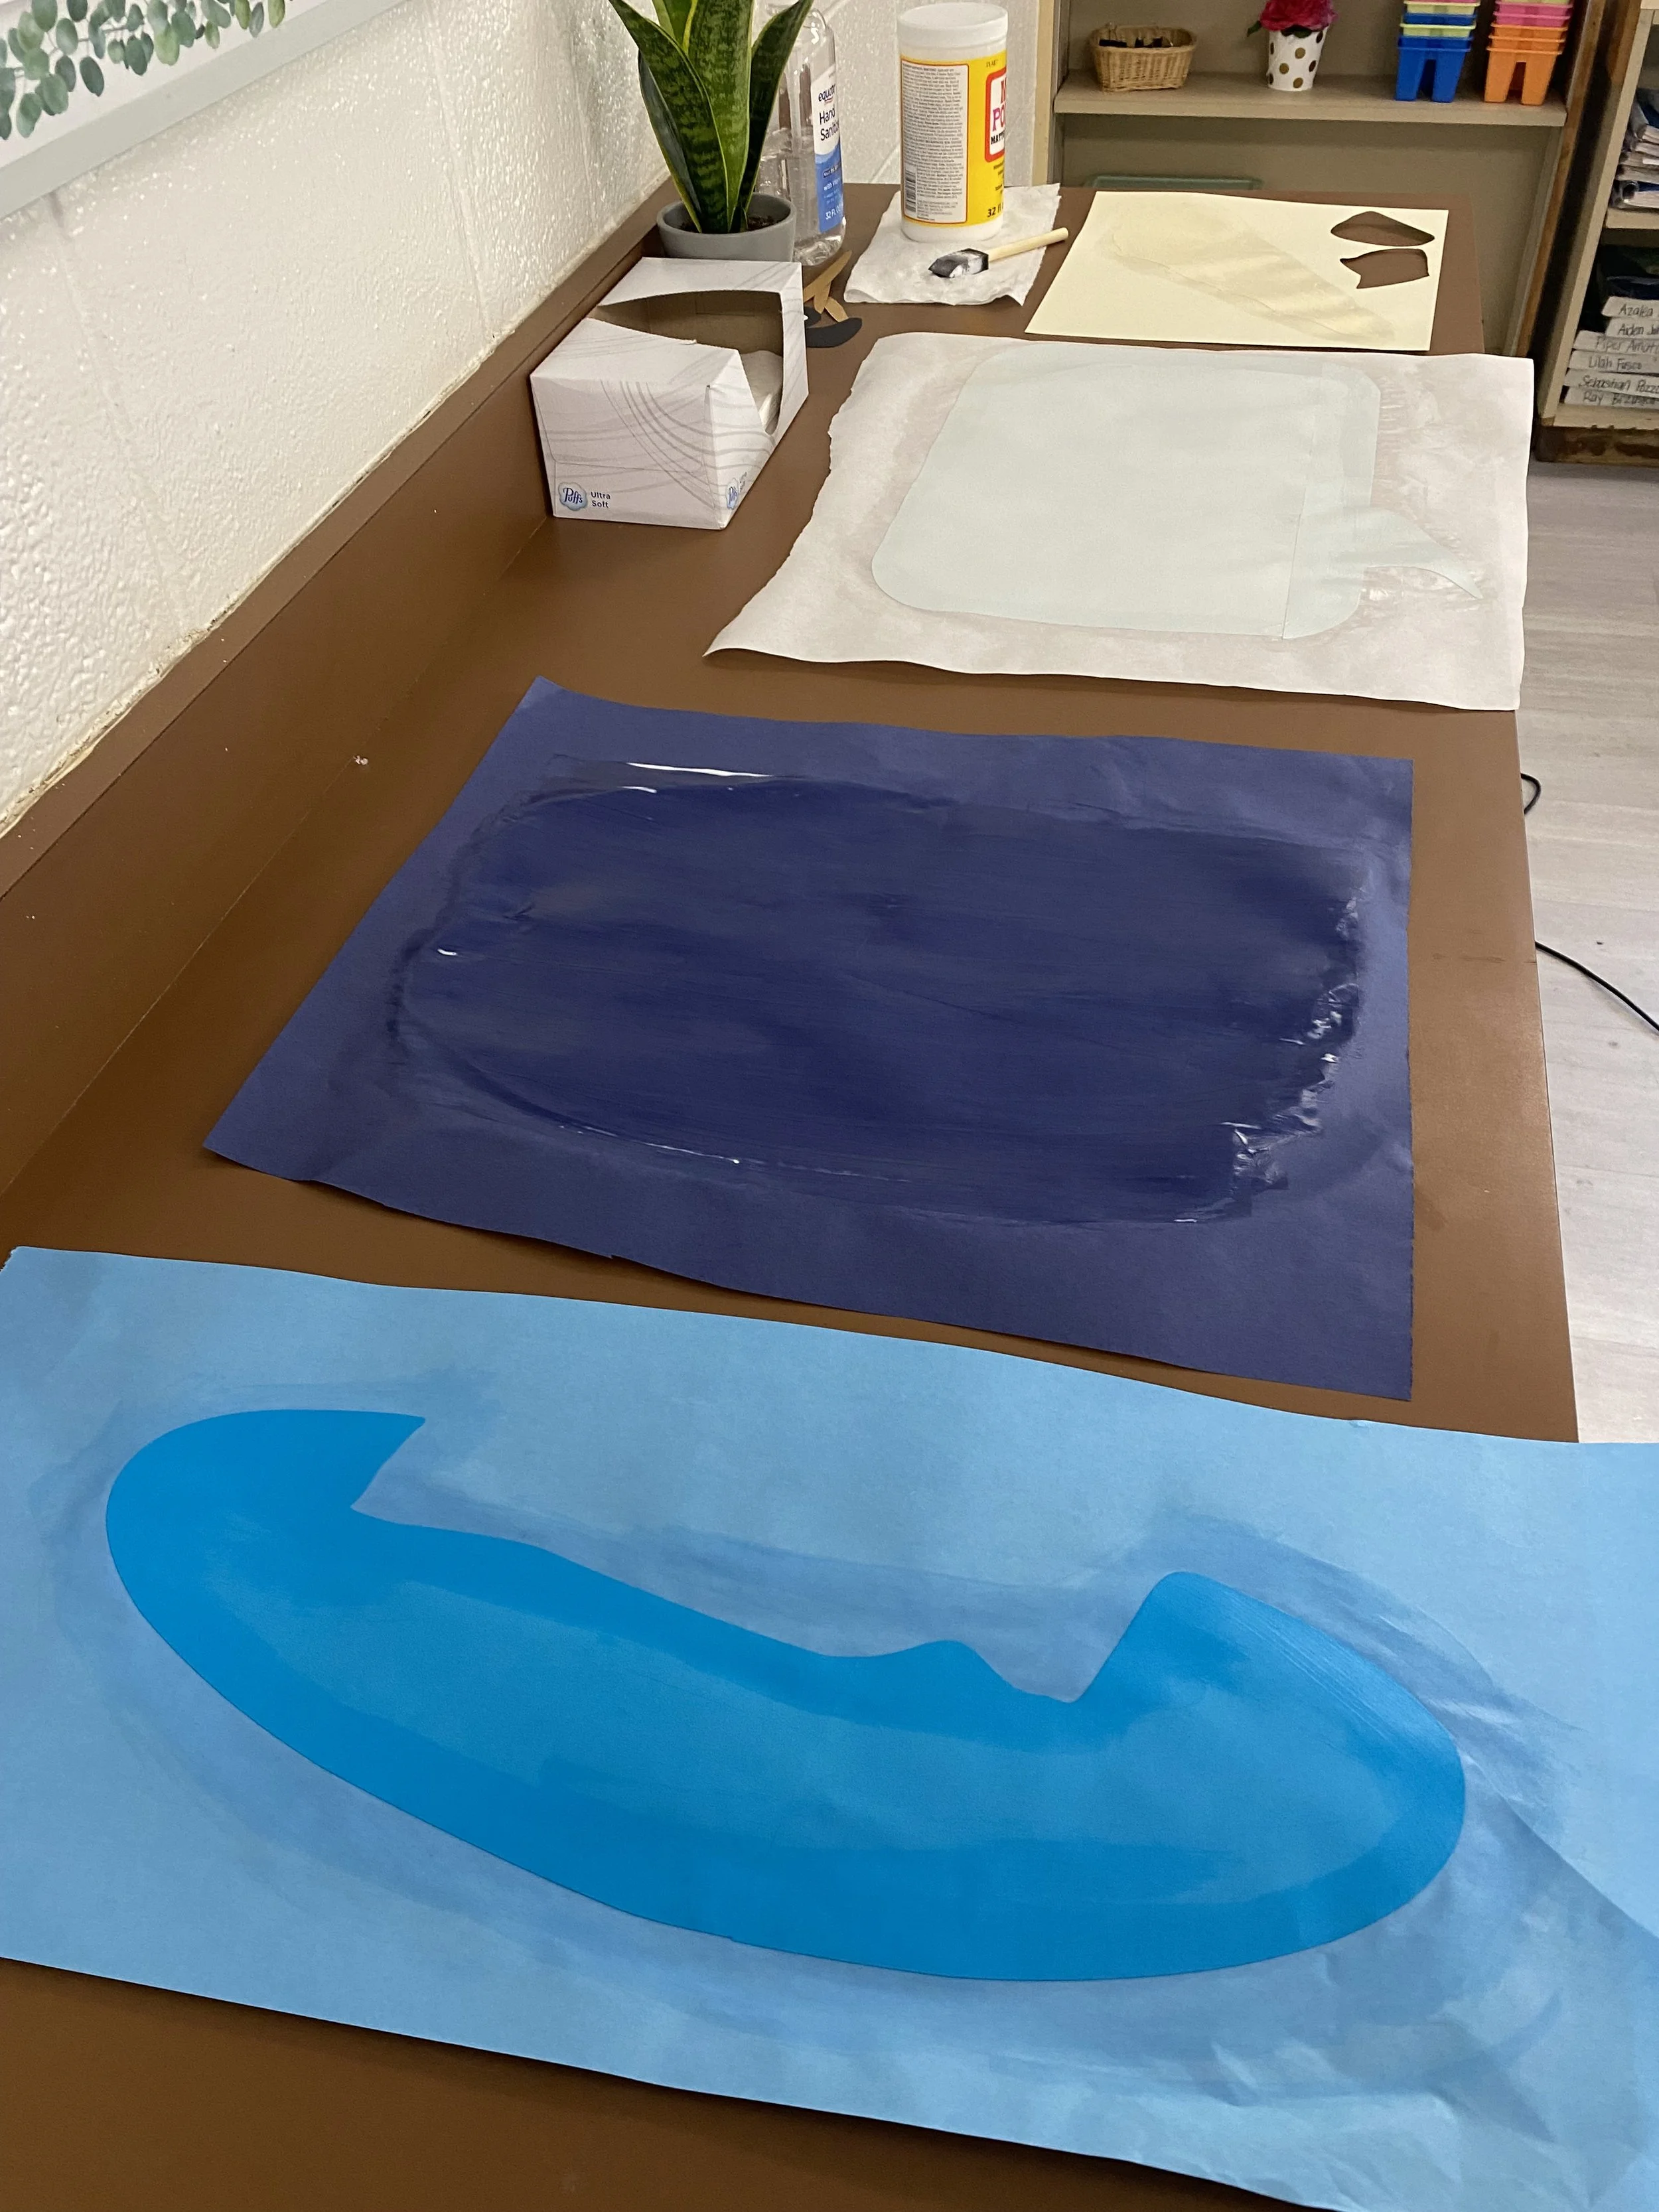
I started on Google images and found a decal with basic outlines of Buddy. I uploaded the image to Design Space and used the features to upload each color as a separate layer. I then searched the average dimensions of a door and created a light blue box this size.
I resized my elf layers to about 4 feet tall, and then uploaded some snowflake SVG files. Since my Elf was going to be larger than my 12” x 12” mat, I used a 11.5” x 11.5” square to slice the design apart.
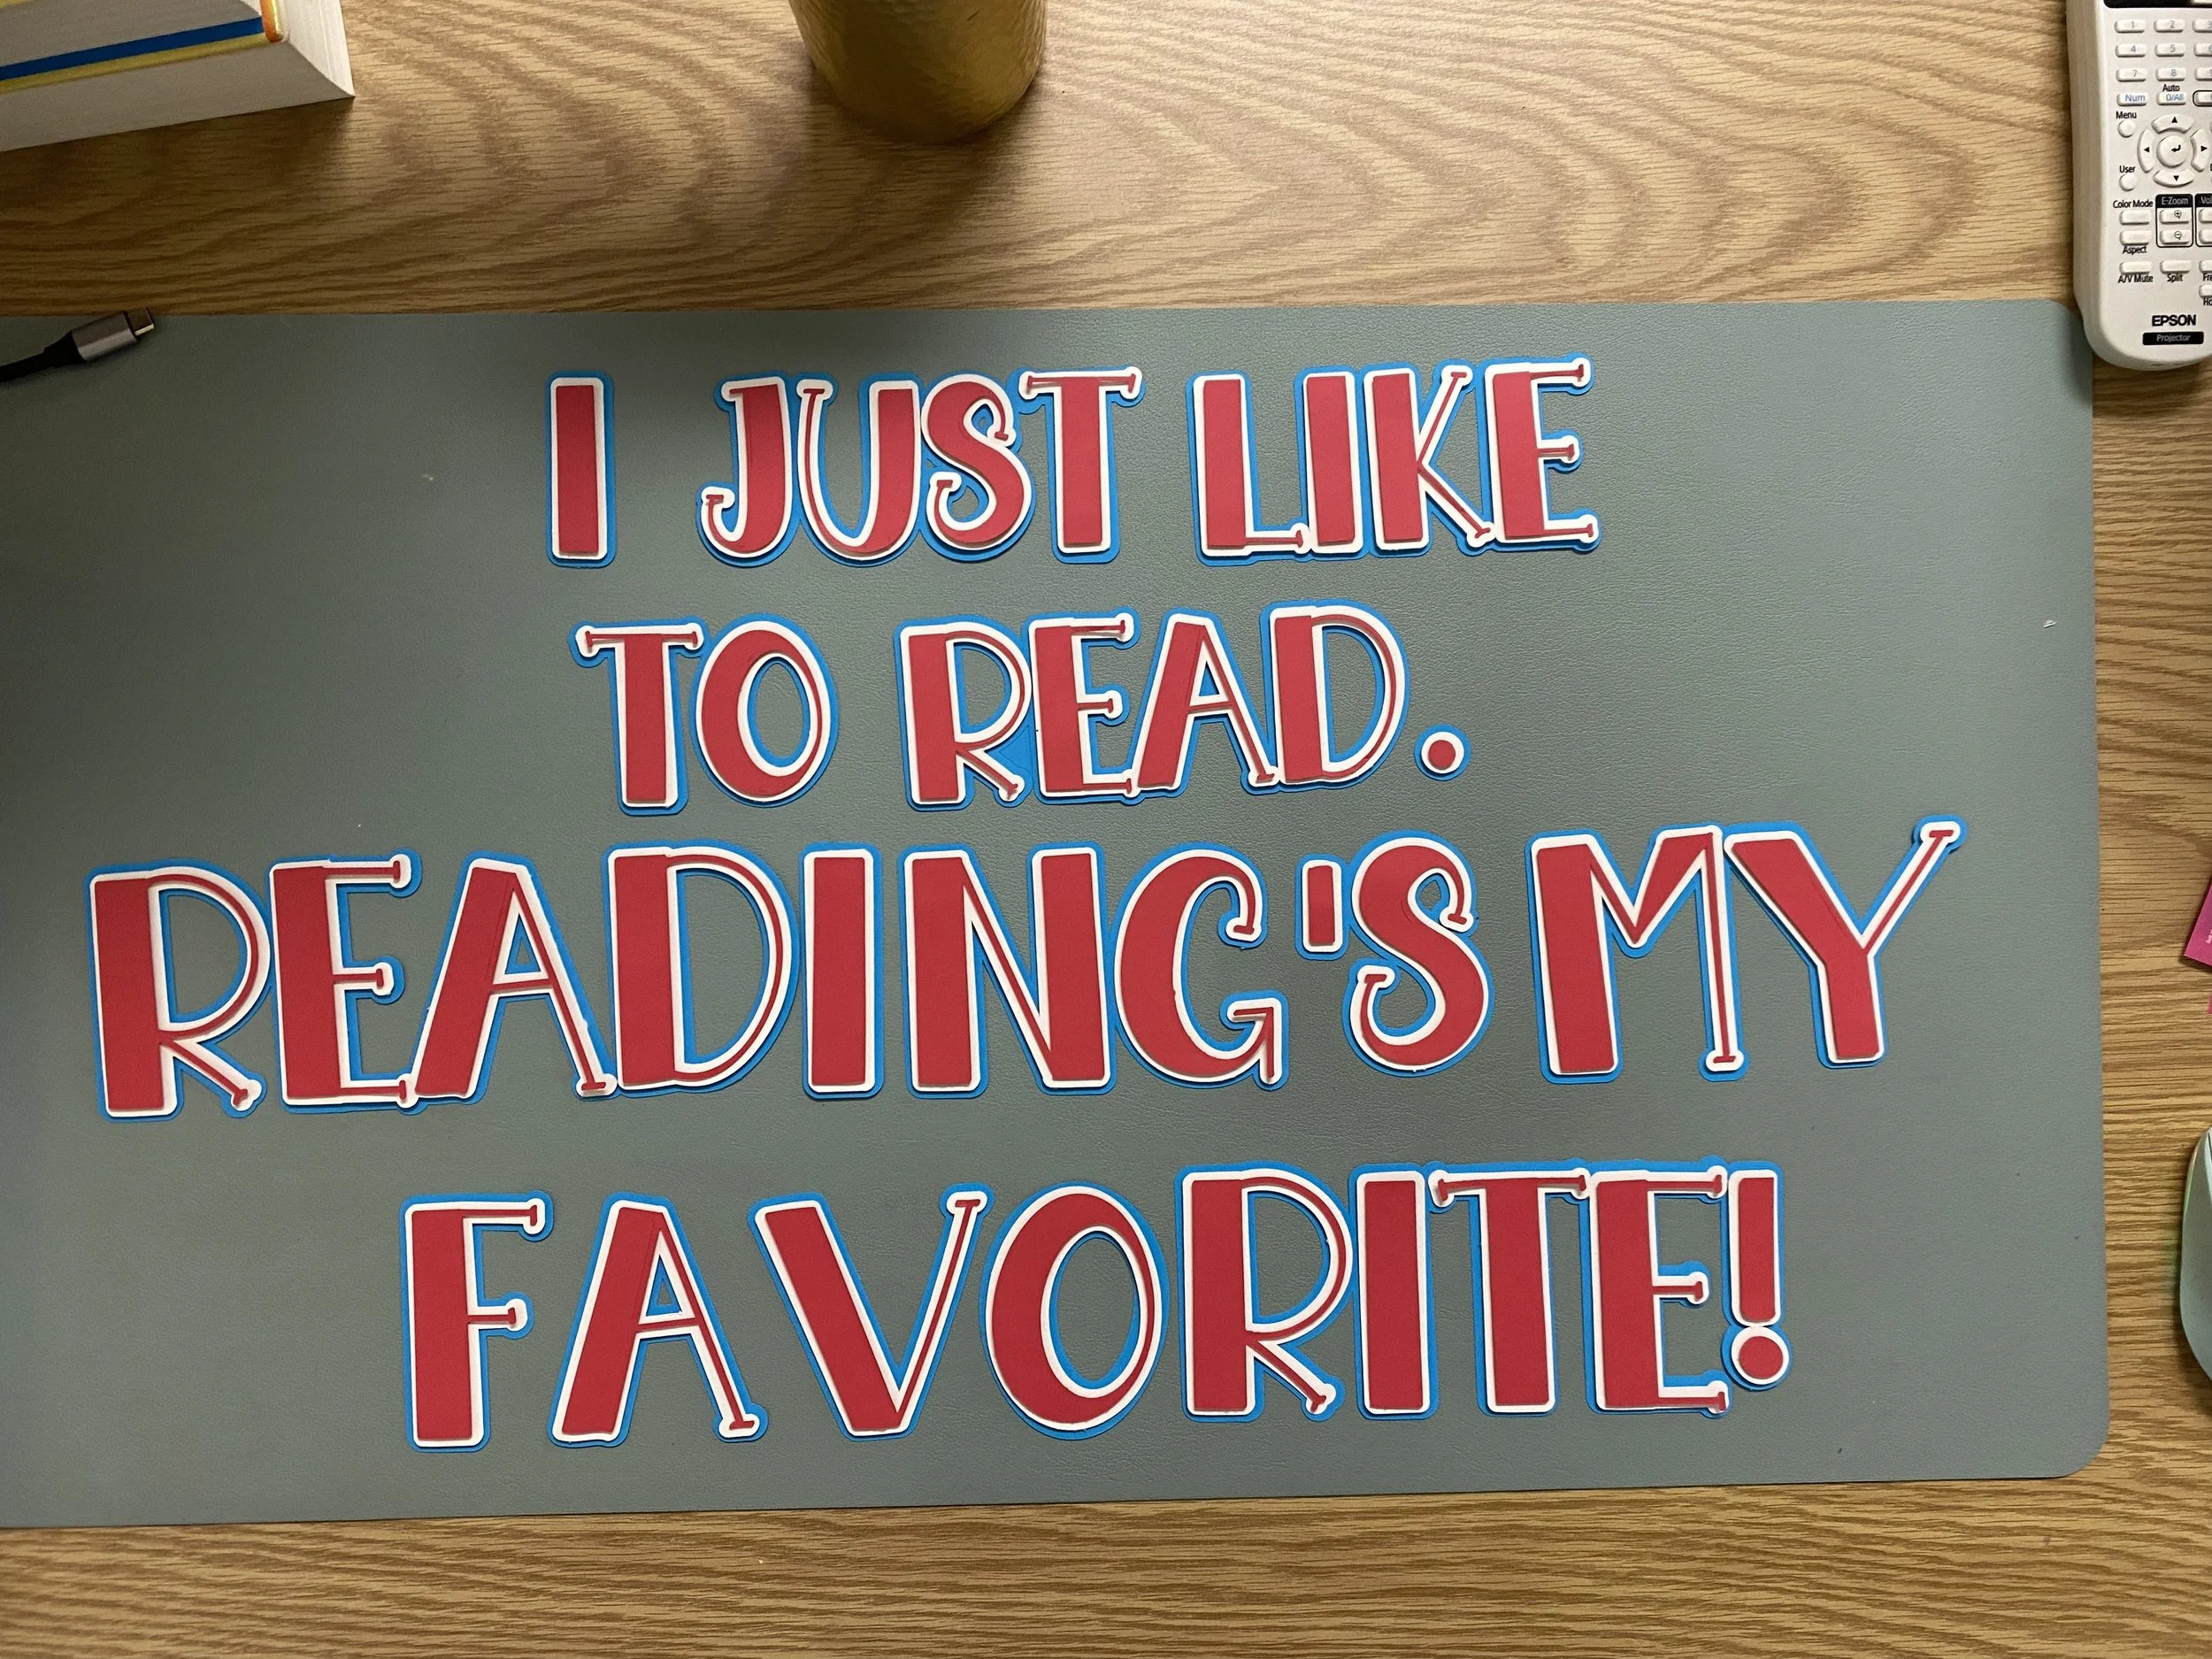
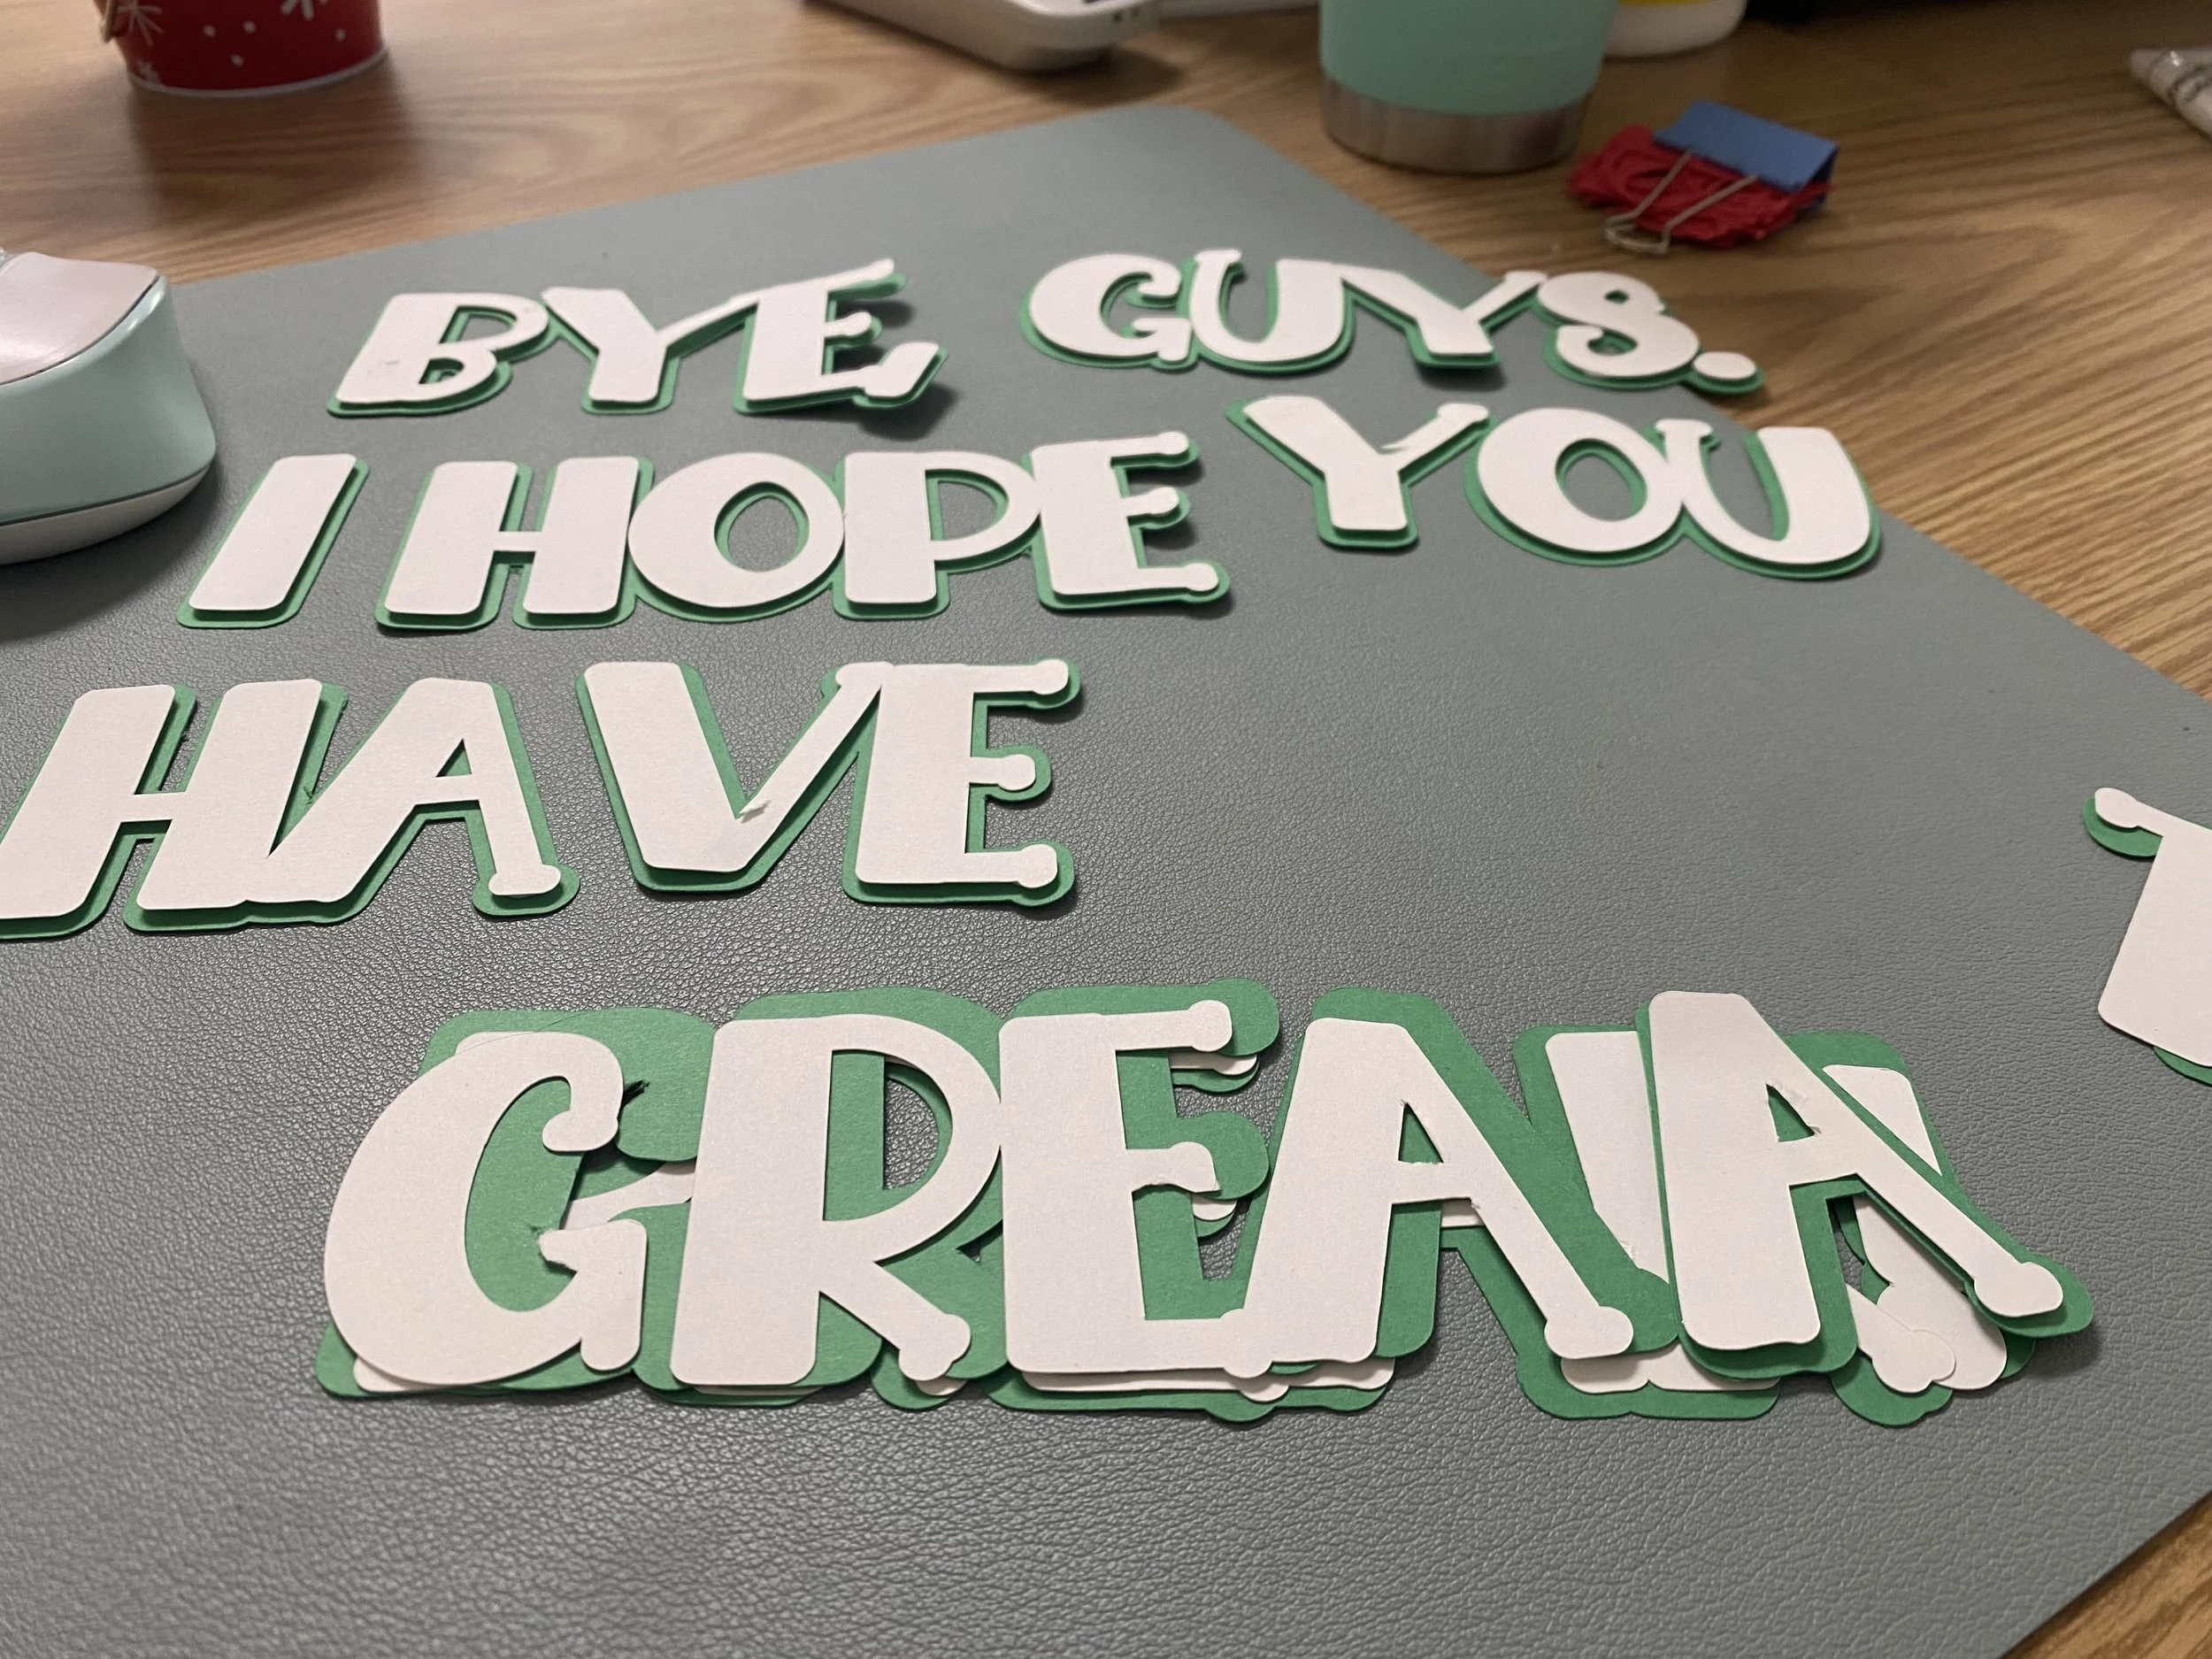
I then went to DaFont.com and searched Christmas fonts. I ended up liking and using a font titled Brother by Belina Studio. After I typed out and resized my text and then separated the letters into their own layers so that I could save paper. I was careful to pay attention to the group size when selecting multiple letters to offset at once. I used the Offset feature and set the basic cut to white. This layer served as a background for securing the red letters. I created a background of the white offset by using the feature again but this time made the layer blue.
I’ve become a huge fan of layered cardstock letters (especially three layers). These layers look amazing with foam dots used to secure them. It creates a nice 3D effect.
I cut out the layers using 12” x 12” cardstock I purchased from Michaels.
Here is the Design Space link to my project.


Assembling the Pieces
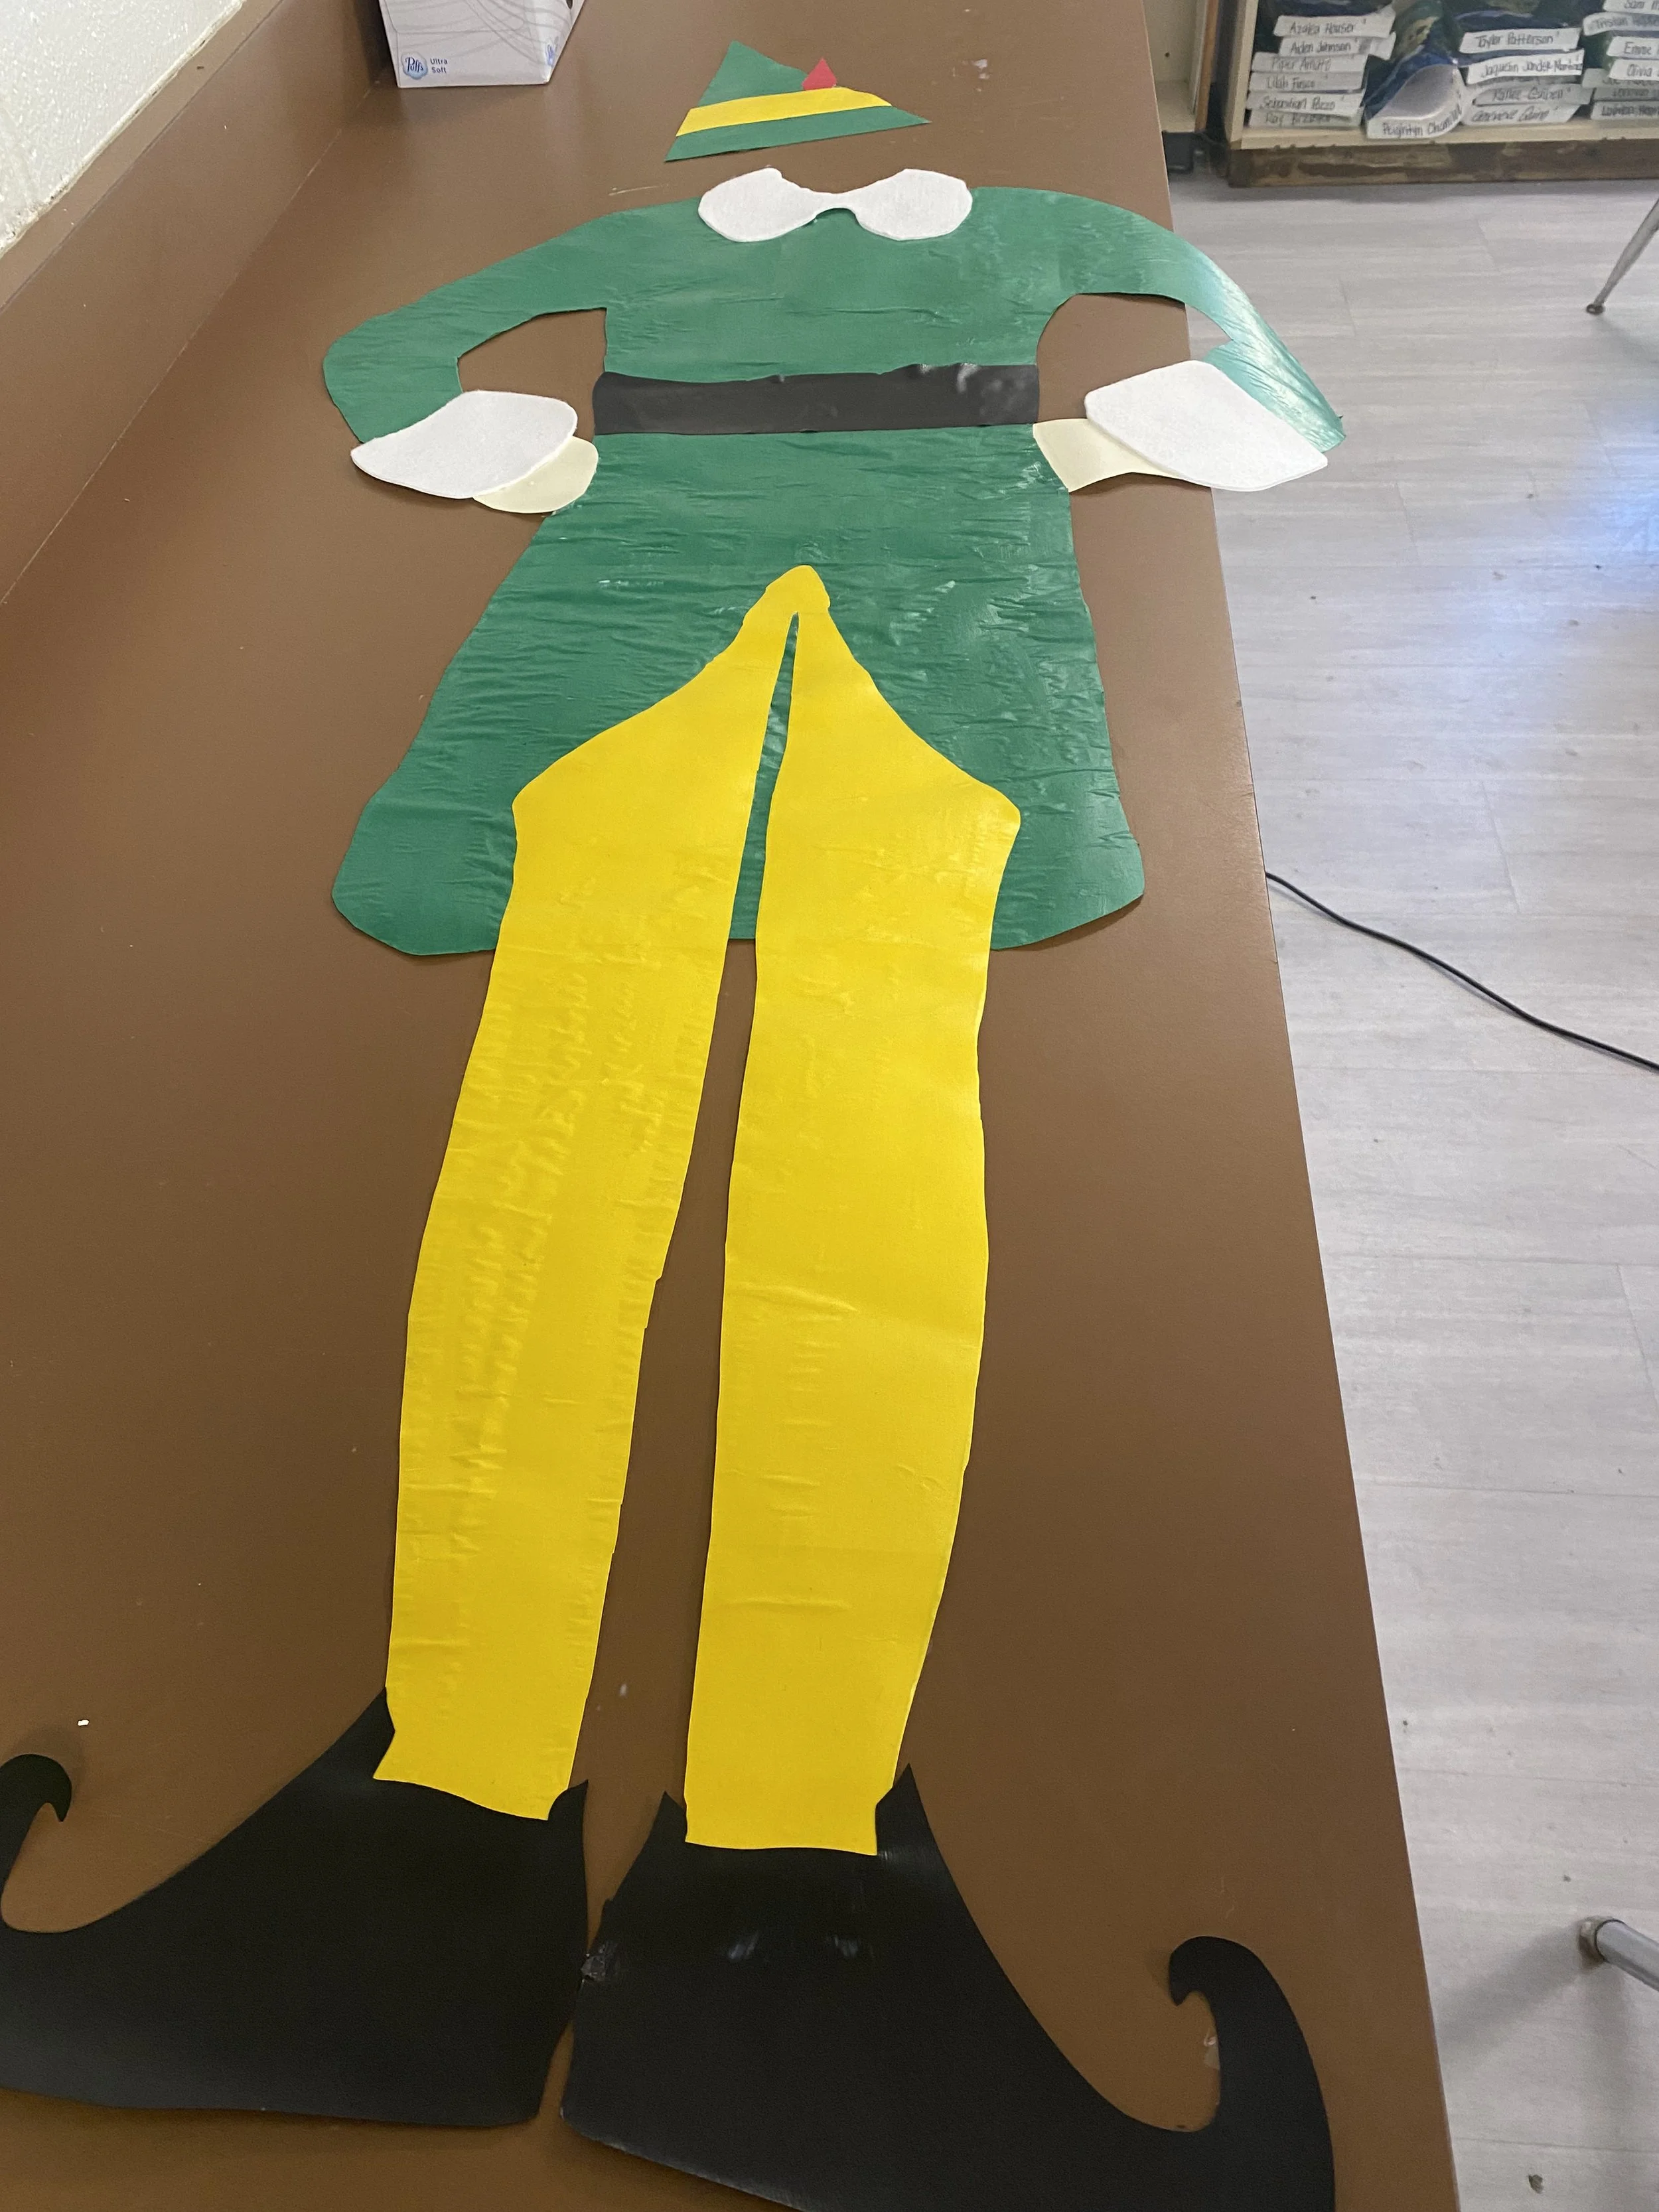
After each color was cut, I taped the individual pieces together. Since I wanted a cohesive look, I went to our school’s media center and used the bulletin board paper in light blue, green, yellow and white. I used a matte mod podge glue and foam brush to apply a generous layer on the backside of the green and yellow cardstock and then carefully pressed the layers of paper together, paying attention to smoothing and sealing the edges. I applied another layer on top of the cardstock along the edges. (Note: The layers will bubble and wrinkle as they dry. It is very stressful, but for the most part it will flatten the more it dries.)
After the mod podge dried, I carefully cut the bulletin paper along the cardstock borders. I then flipped each layer over and mod podged the front sides to create a matte laminated look and give the layer more structure. After these layers dried, I continued to mod podge to secure the layers together.
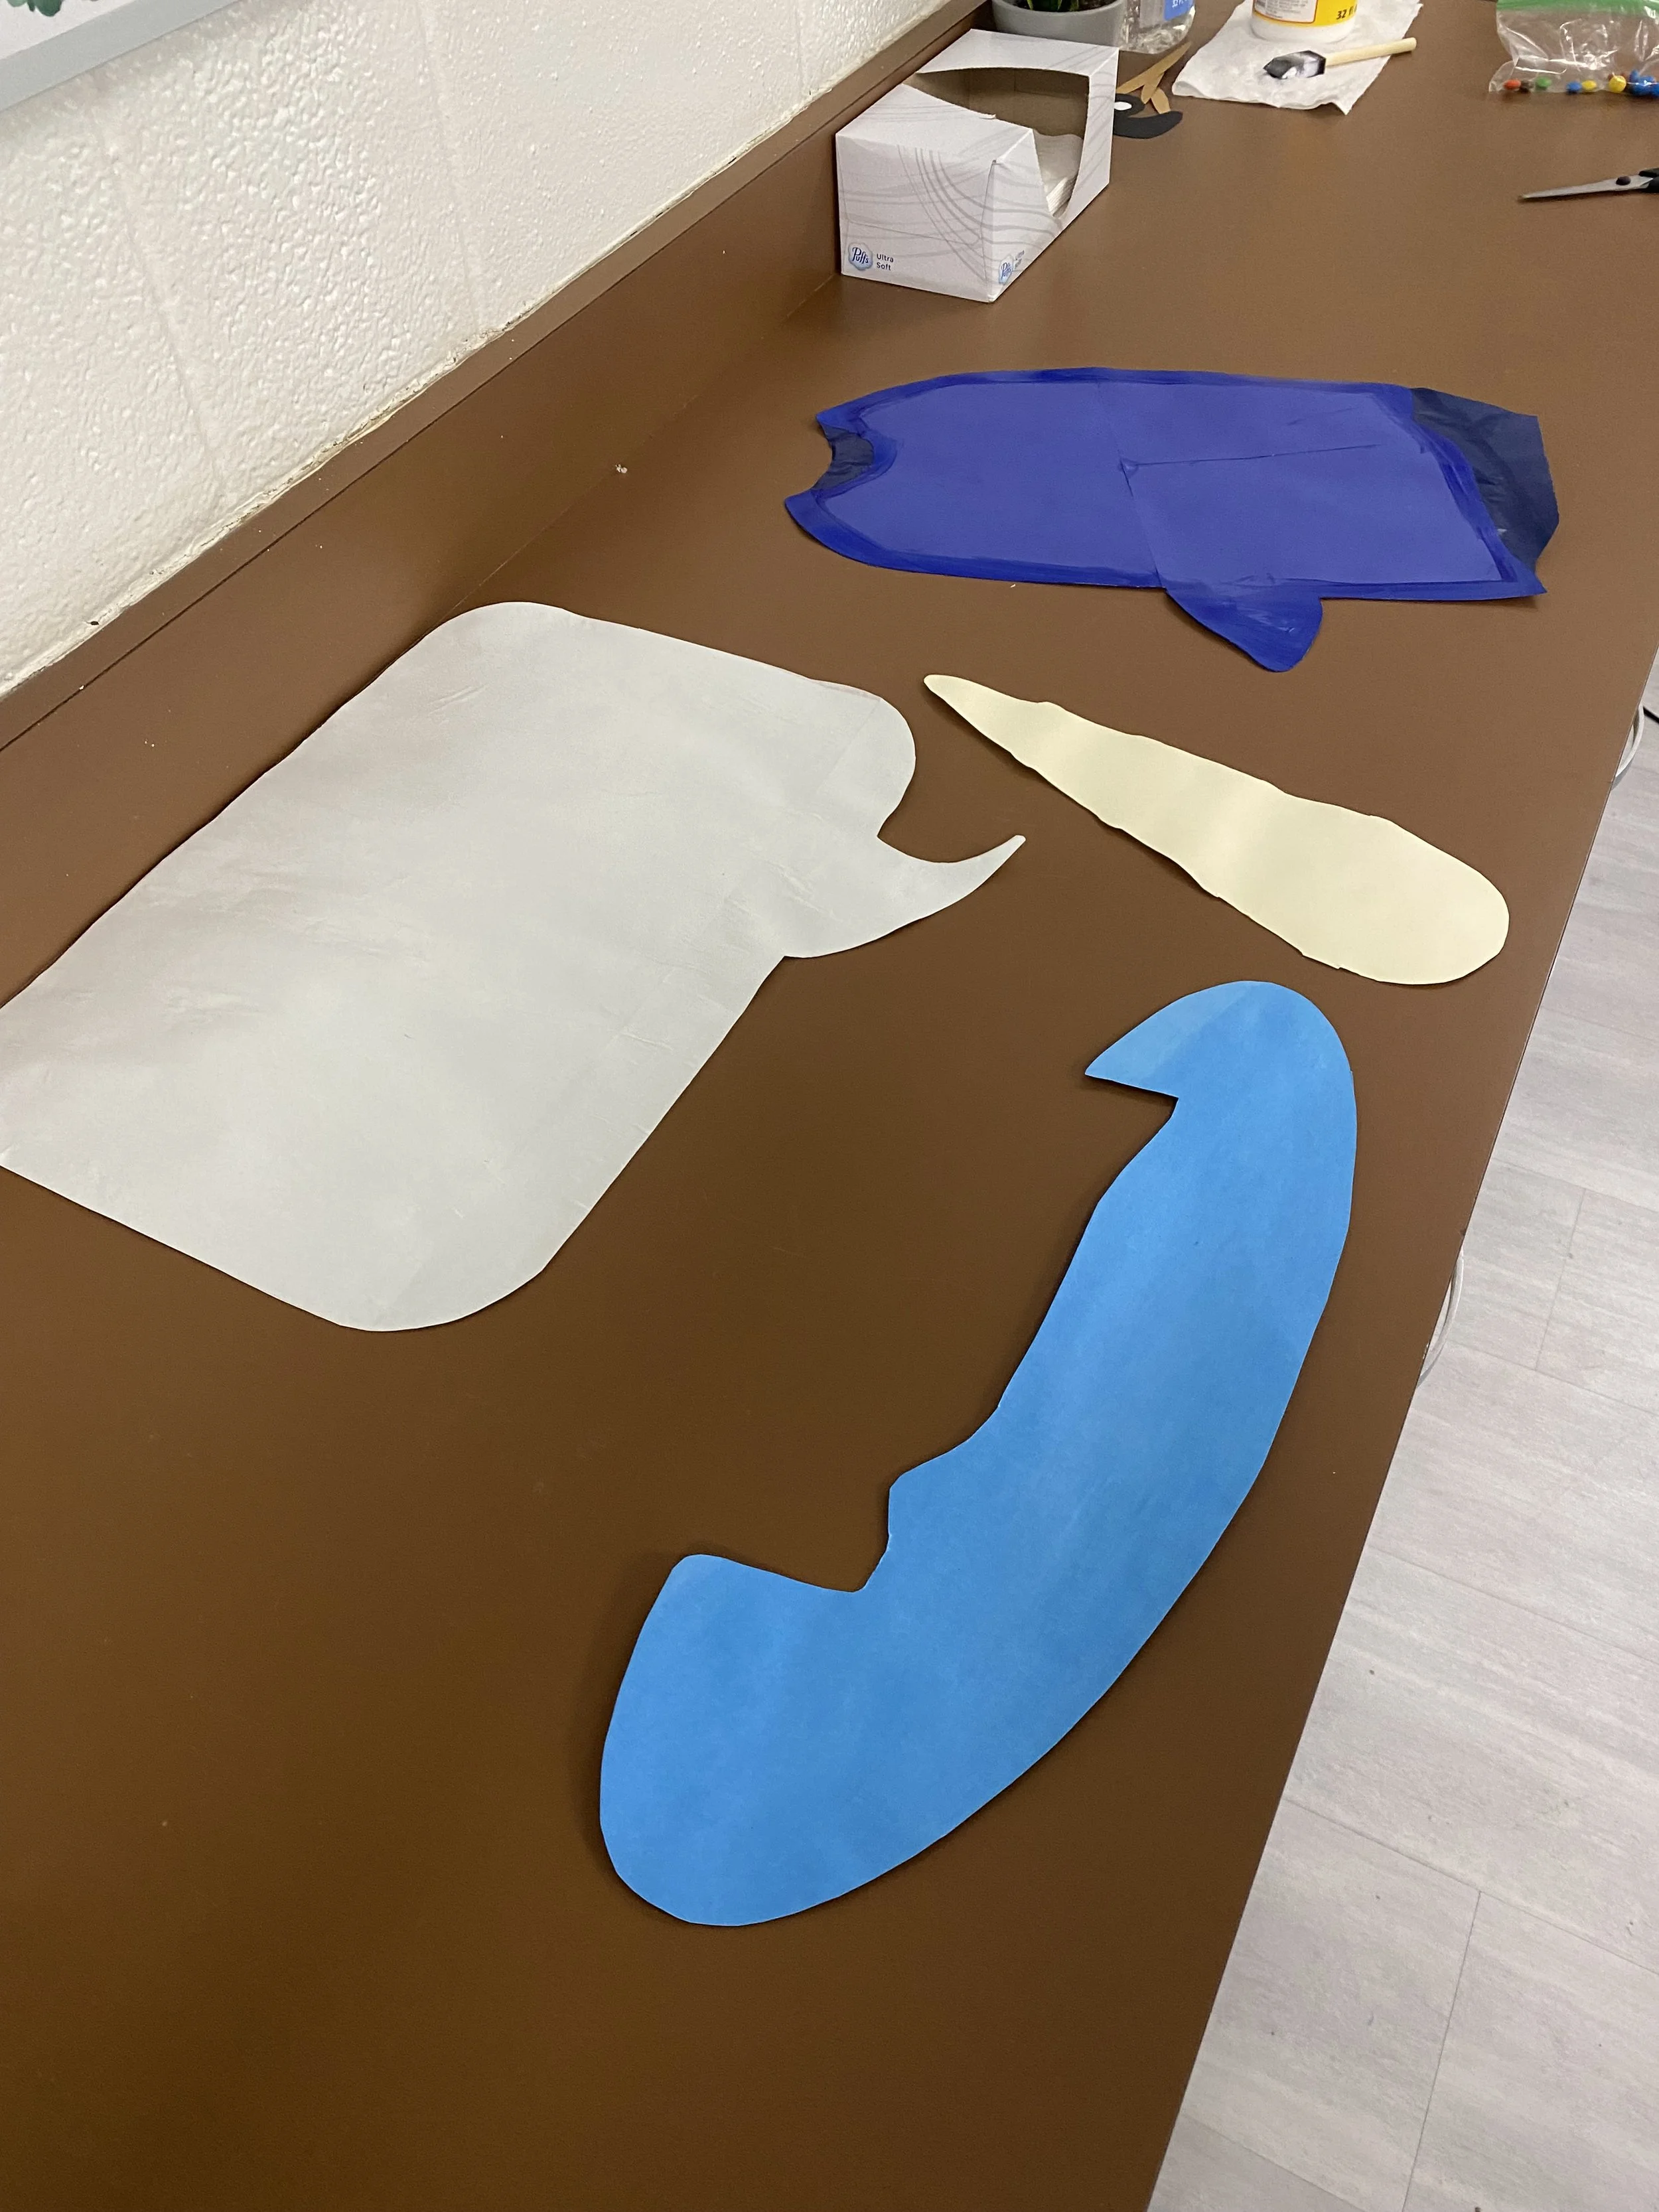
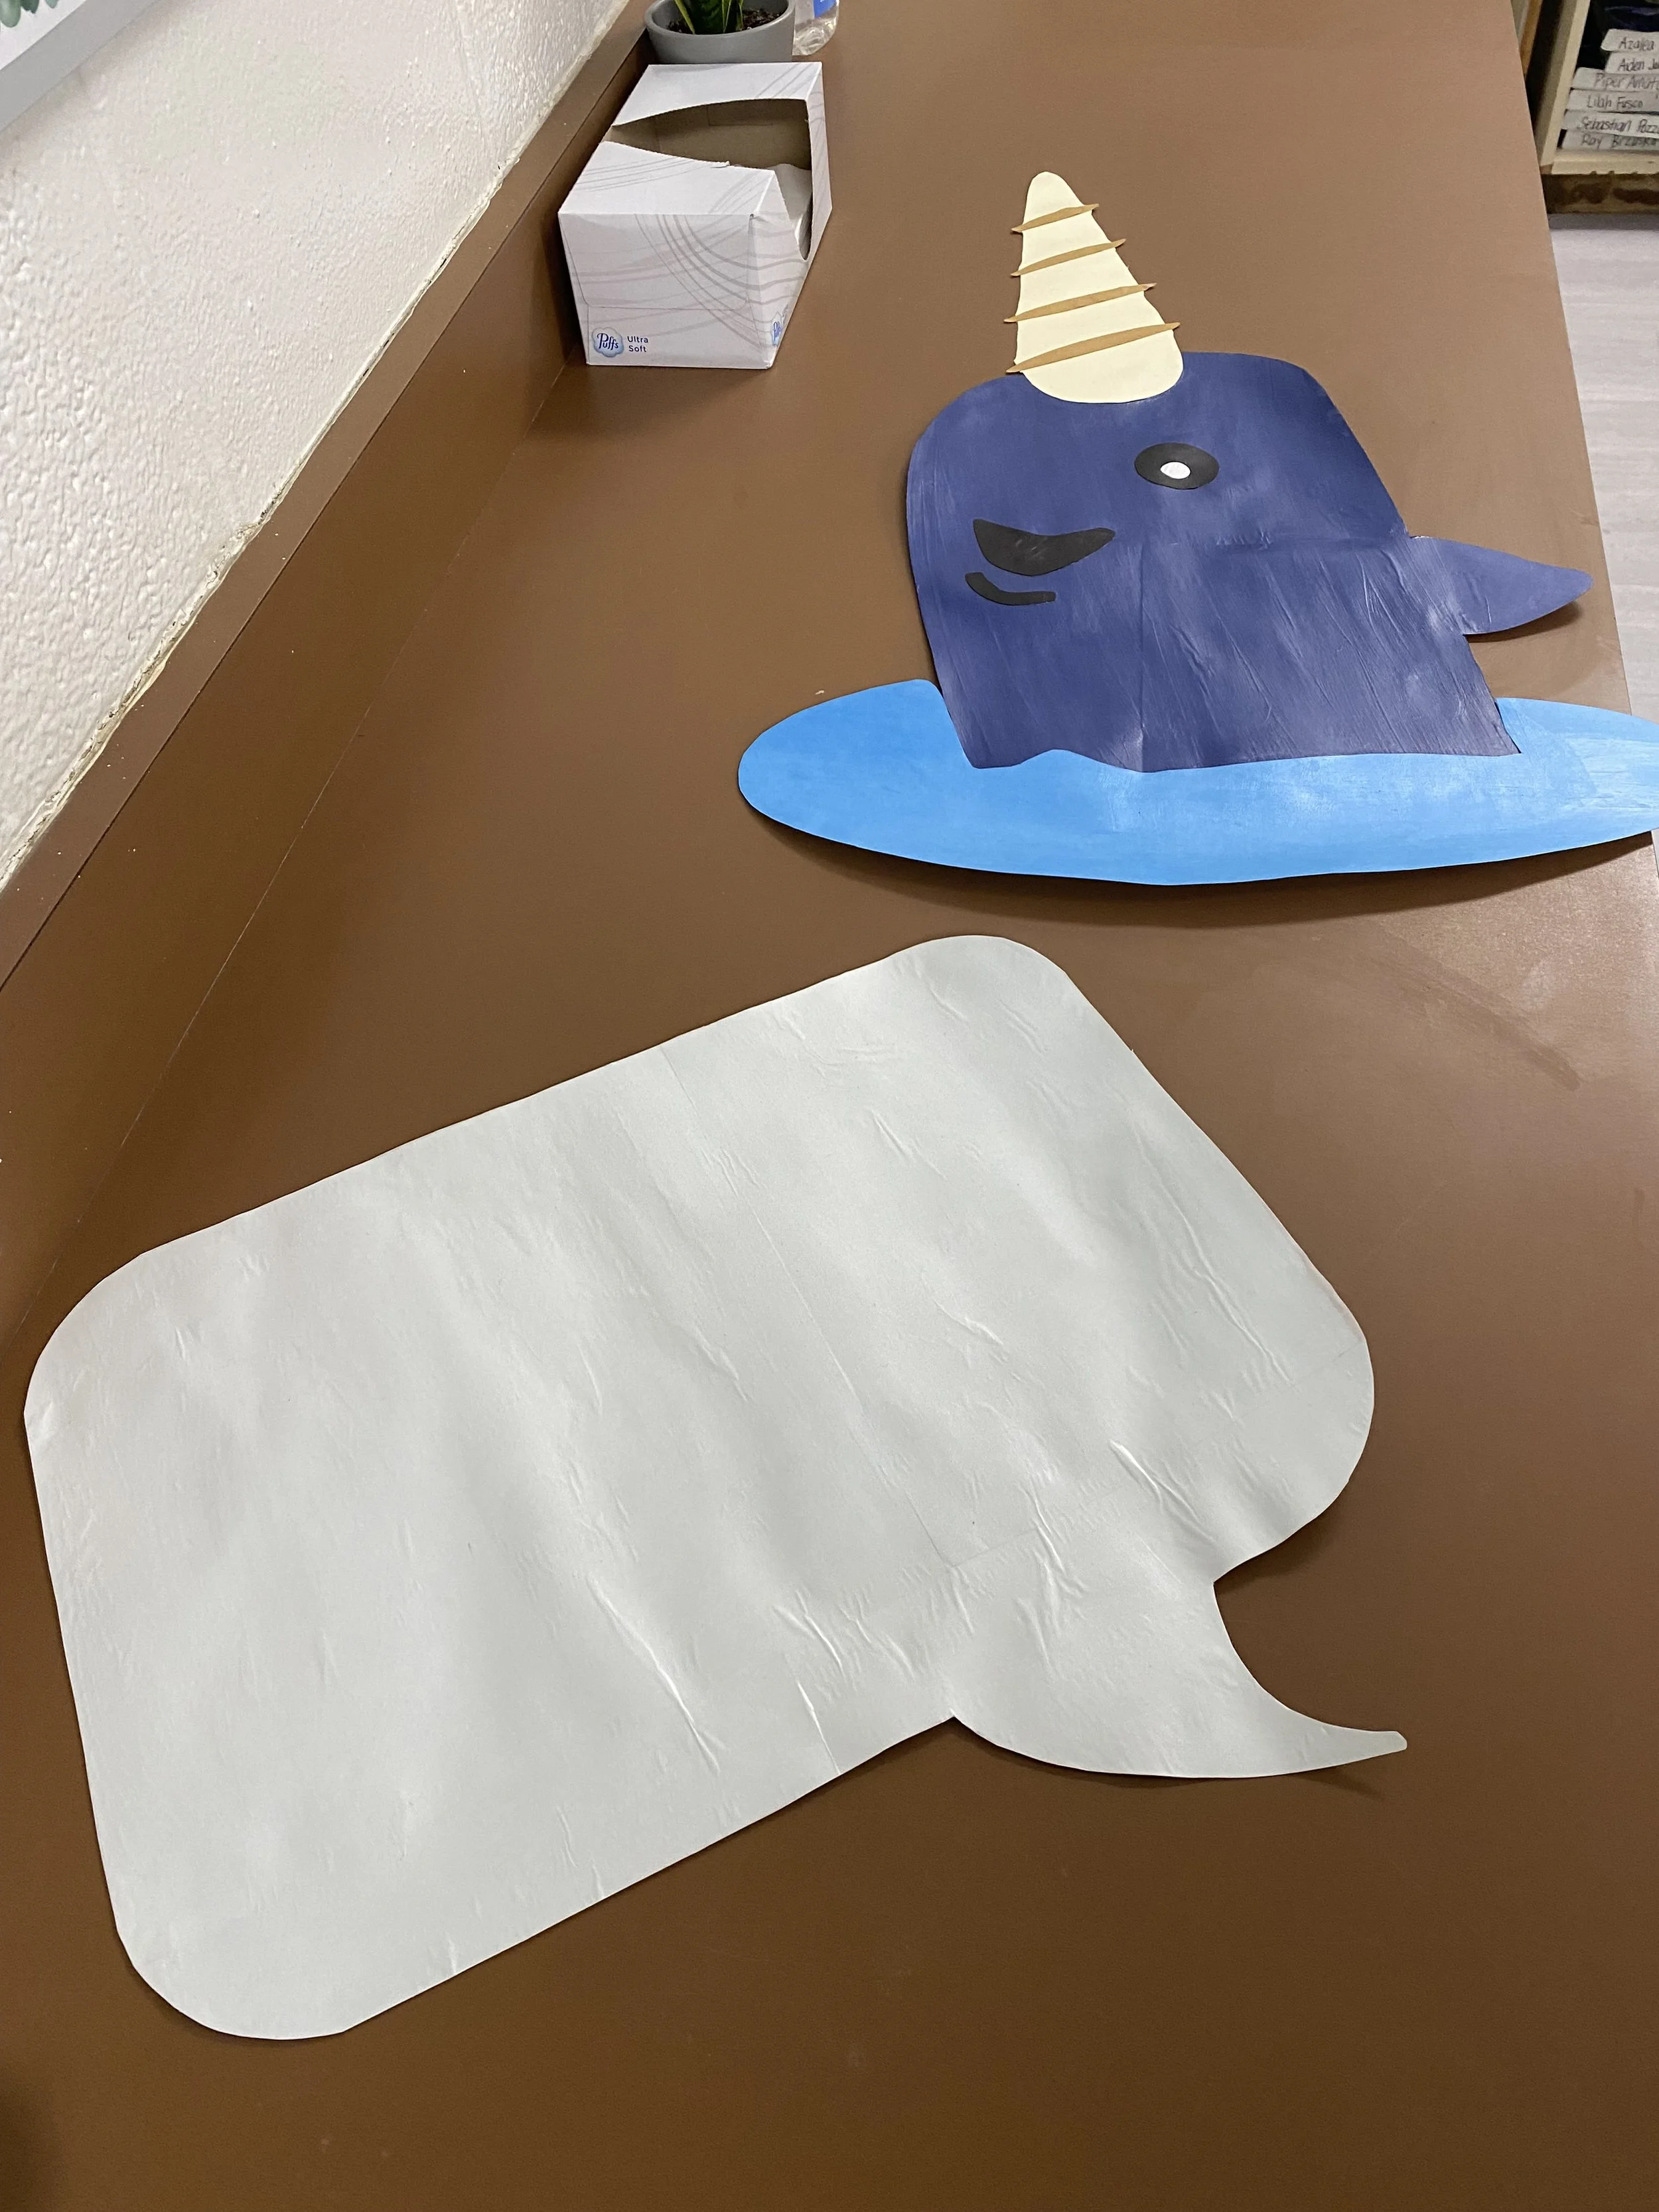
For the white collar and sleeve pieces, I glued the cardstock to white felt and cut them out like I did the other layers. The shoes, belt, and hand pieces were not double layered with bulletin paper. I used a metallic cardstock I had left over from a previous project to make the belt buckle look more realistic.


Putting the Pieces on the Door
Since it’s been a long time since I decorated a door, I didn’t really have a detailed plan going into it. I started with the light blue bulletin board paper and some packing tape. I secured the top right corner first and then the top left corner. I cut off the excess at the bottom of the door and then went back to the top, securing the sides after pulling the paper tightly.
Then, I held up Buddy to figure out where the head hole needed to be cut. I didn’t realize the door handle was going to require him to be so far off the ground, but I knew I could compensate with the white paper and make a snowy hill layer.
I cut a straight line in the middle of the window and then cut from the top and bottom of the line horizontally to the window frame. I folded the paper inward and then cut off a little less than the excess. I folded the paper in to make a smooth seam and then taped the paper to the inside of the window frame. I was glad to have Buddy’s collar and hat; they hid my less than smooth cuts at the top and bottom of the hole.
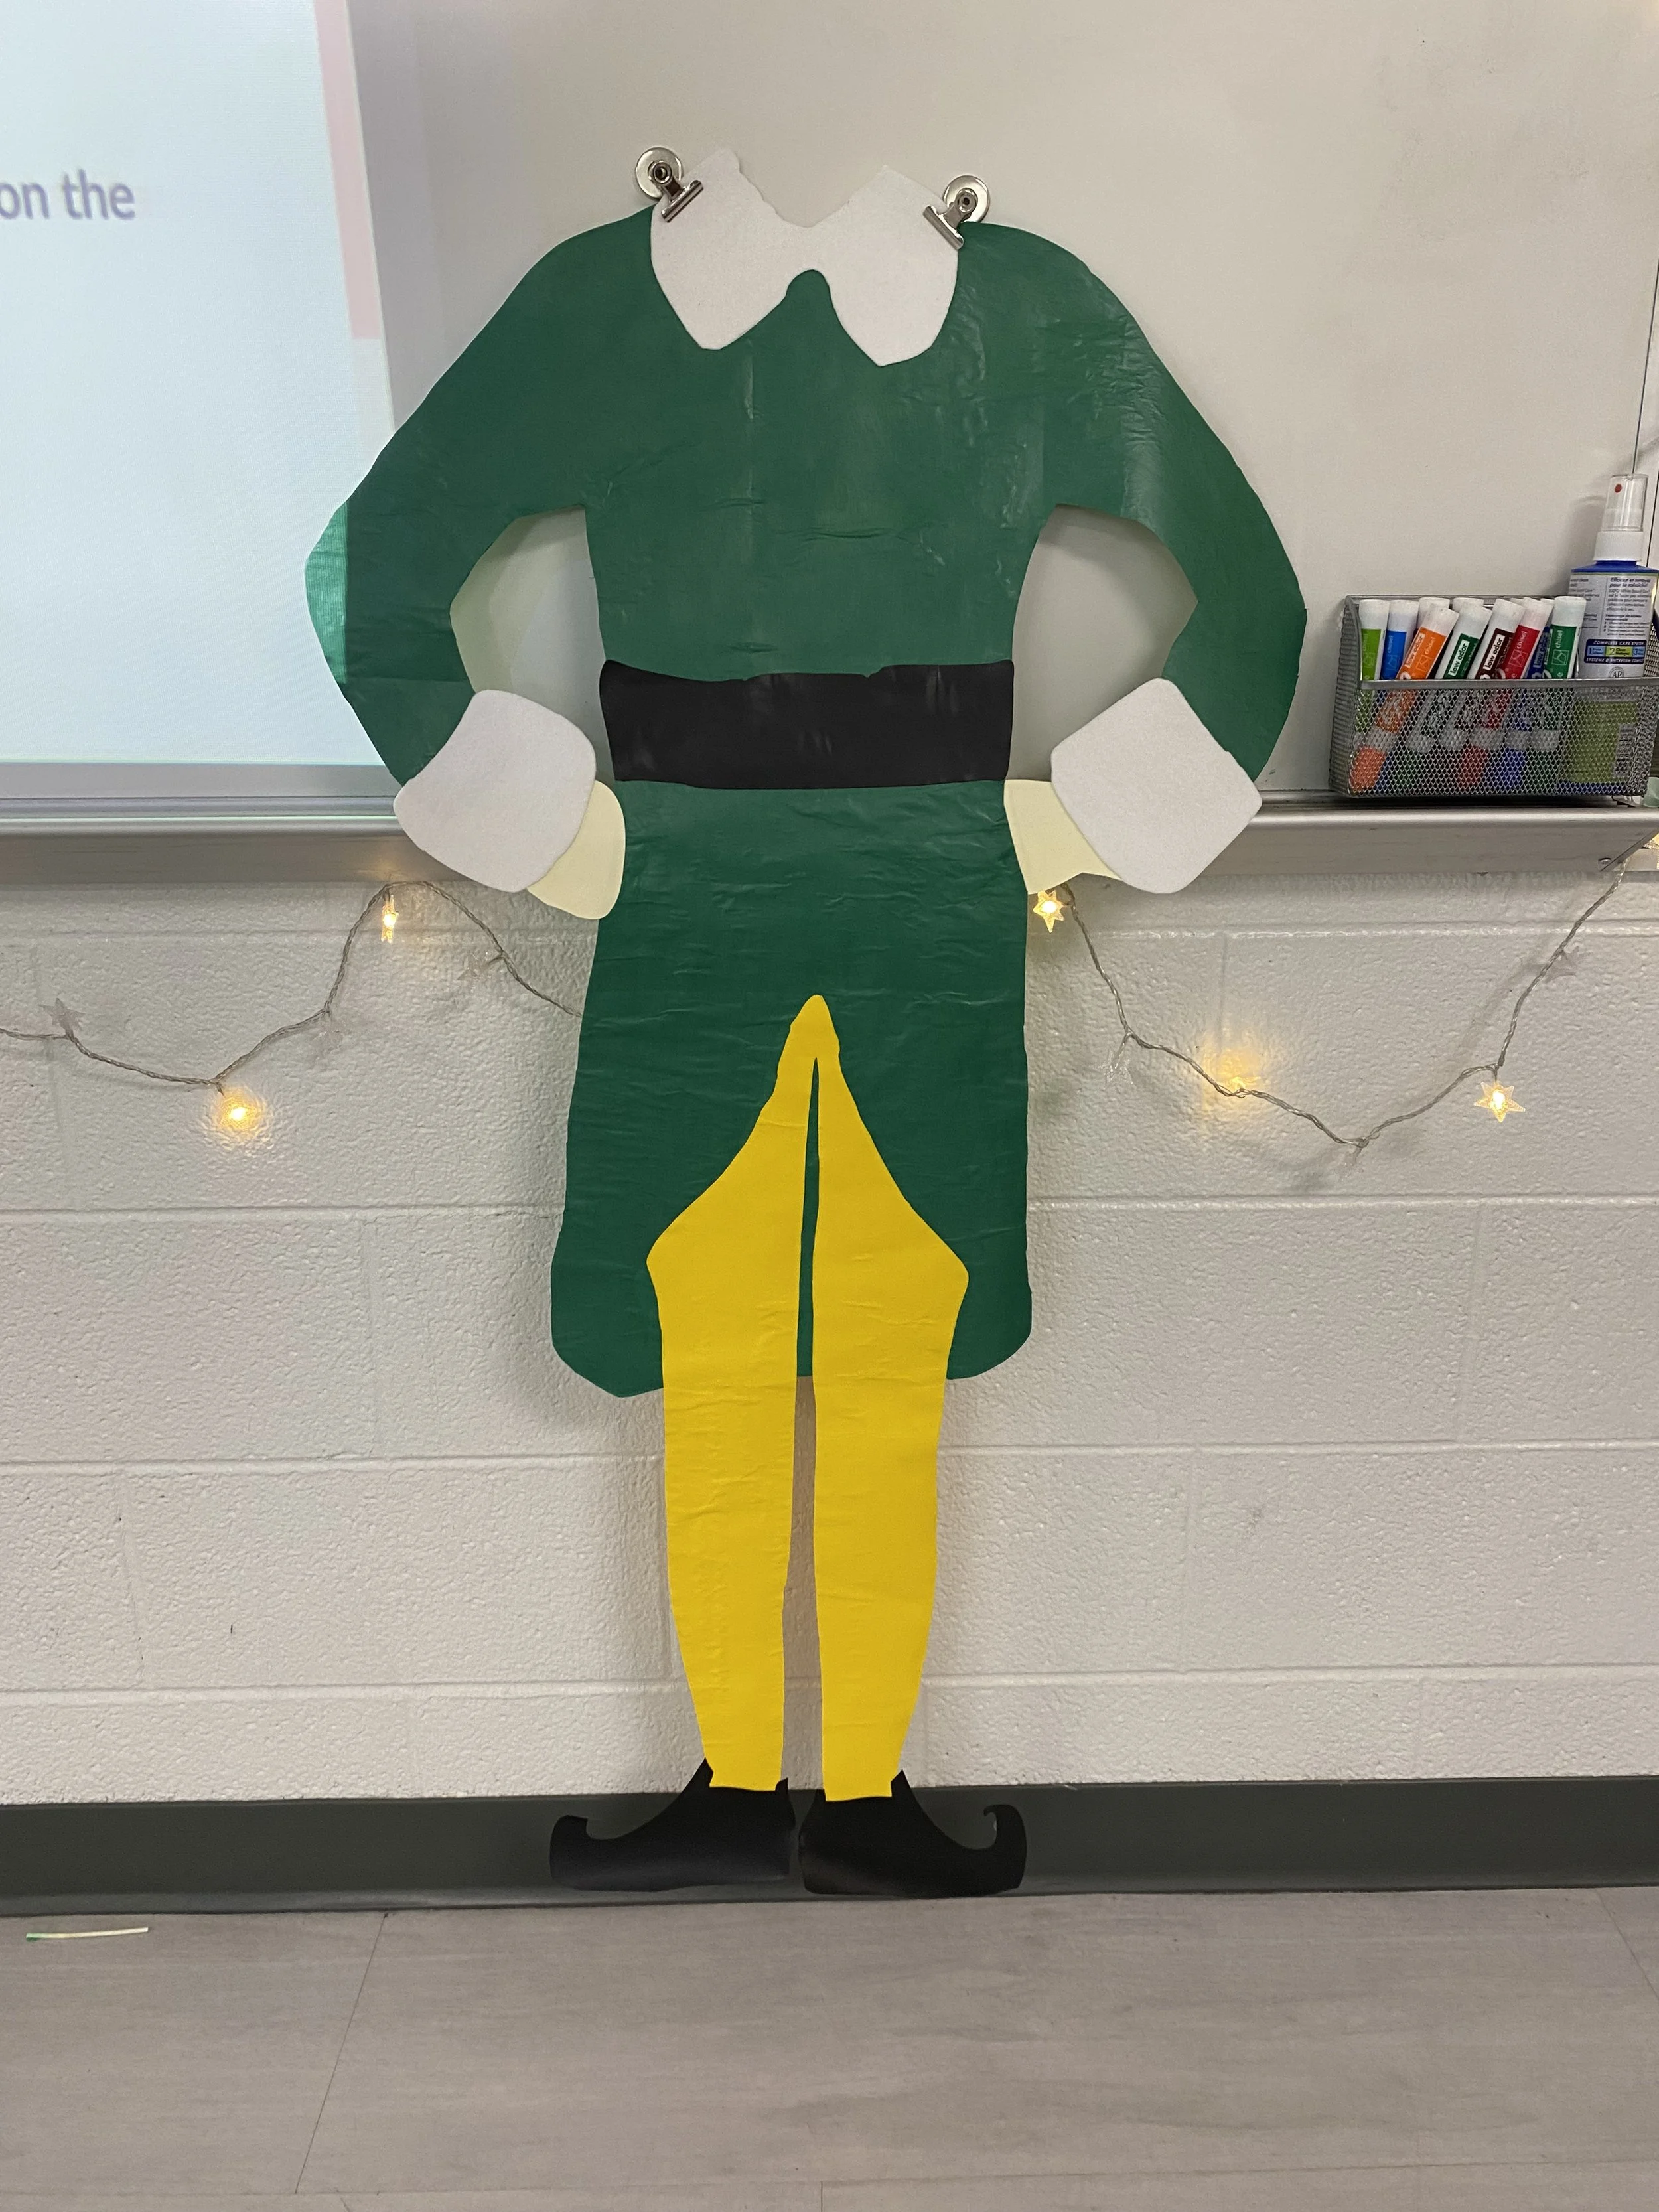
I used a hot glue gun to secure Buddy to the paper, working from his cap to his waist. Before I secured the legs and shoes, I cut the white paper and secured that to the door with packing tape like I had done with the blue paper. Then, I glued his legs and shoes down.
I laid out the letters on the ground in a way that worked with the change in space since Buddy needed to be higher off the ground. I glued the tops of each letter and placed them first. Then, I went back and secured the bottoms.
Lastly, I hot glued the snowflakes by placing the larger ones first. The last small snowflake didn’t seem to fit nicely anywhere, so I ended up cutting it in half and placing it on the edges.


Adding Narwhal
I finished the elf on Thursday and didn’t need to have the door display up until the following Wednesday, so I figured I had time to add narwhal to the display. Since the space on the door was already accounted for, I decided he would be next to the door. I also wanted to change the phrase, “Bye, Buddy. I hope you find your dad,” to “Bye, guys. I hope you have a great break!” I repeated the same process that I used to create the elf. I uploaded an image and used the features to upload each color as a separate layer into Cricut Design Space. I then used the same font, but this time I added a speech bubble to have somewhere consistent to place the letters. Since narwhal has a lot of blue in his design, I also decided to use a green background for the second offset layer, so the letters would go from red to white to green. I thought this would tie in the green from the elf and make the whole display look more cohesive.
Here is the Design Space link for the Narwhal pieces.


Overall, this was fun to make and the students really enjoyed the display.