
Gatsby Party
Each year our English classes read a novel during the fourth quarter. This year, we decided to host a Gatsby Reception for English III classes after they read F. Scott Fitzgerald’s The Great Gatsby.
Here’s how we put on this fabulous event…

The Flyer
I used Canva to design the flyer. We printed out colored copies to be displayed in the English III classrooms and black and white copies to go home with the students. Here is the template link to customize it yourself.
I highly recommend the requirement of 1920s inspired dress/costumes to participate. The students got really into it. Many got into character and when there were multiple Toms, Daisys, and Gatsbys, they started to compete seeing who could be more authentic to the way they were portrayed in the novel. The ones who didn’t get into character found themselves debating which social class they would belong if they themselves were in the novel. It was fantastic!
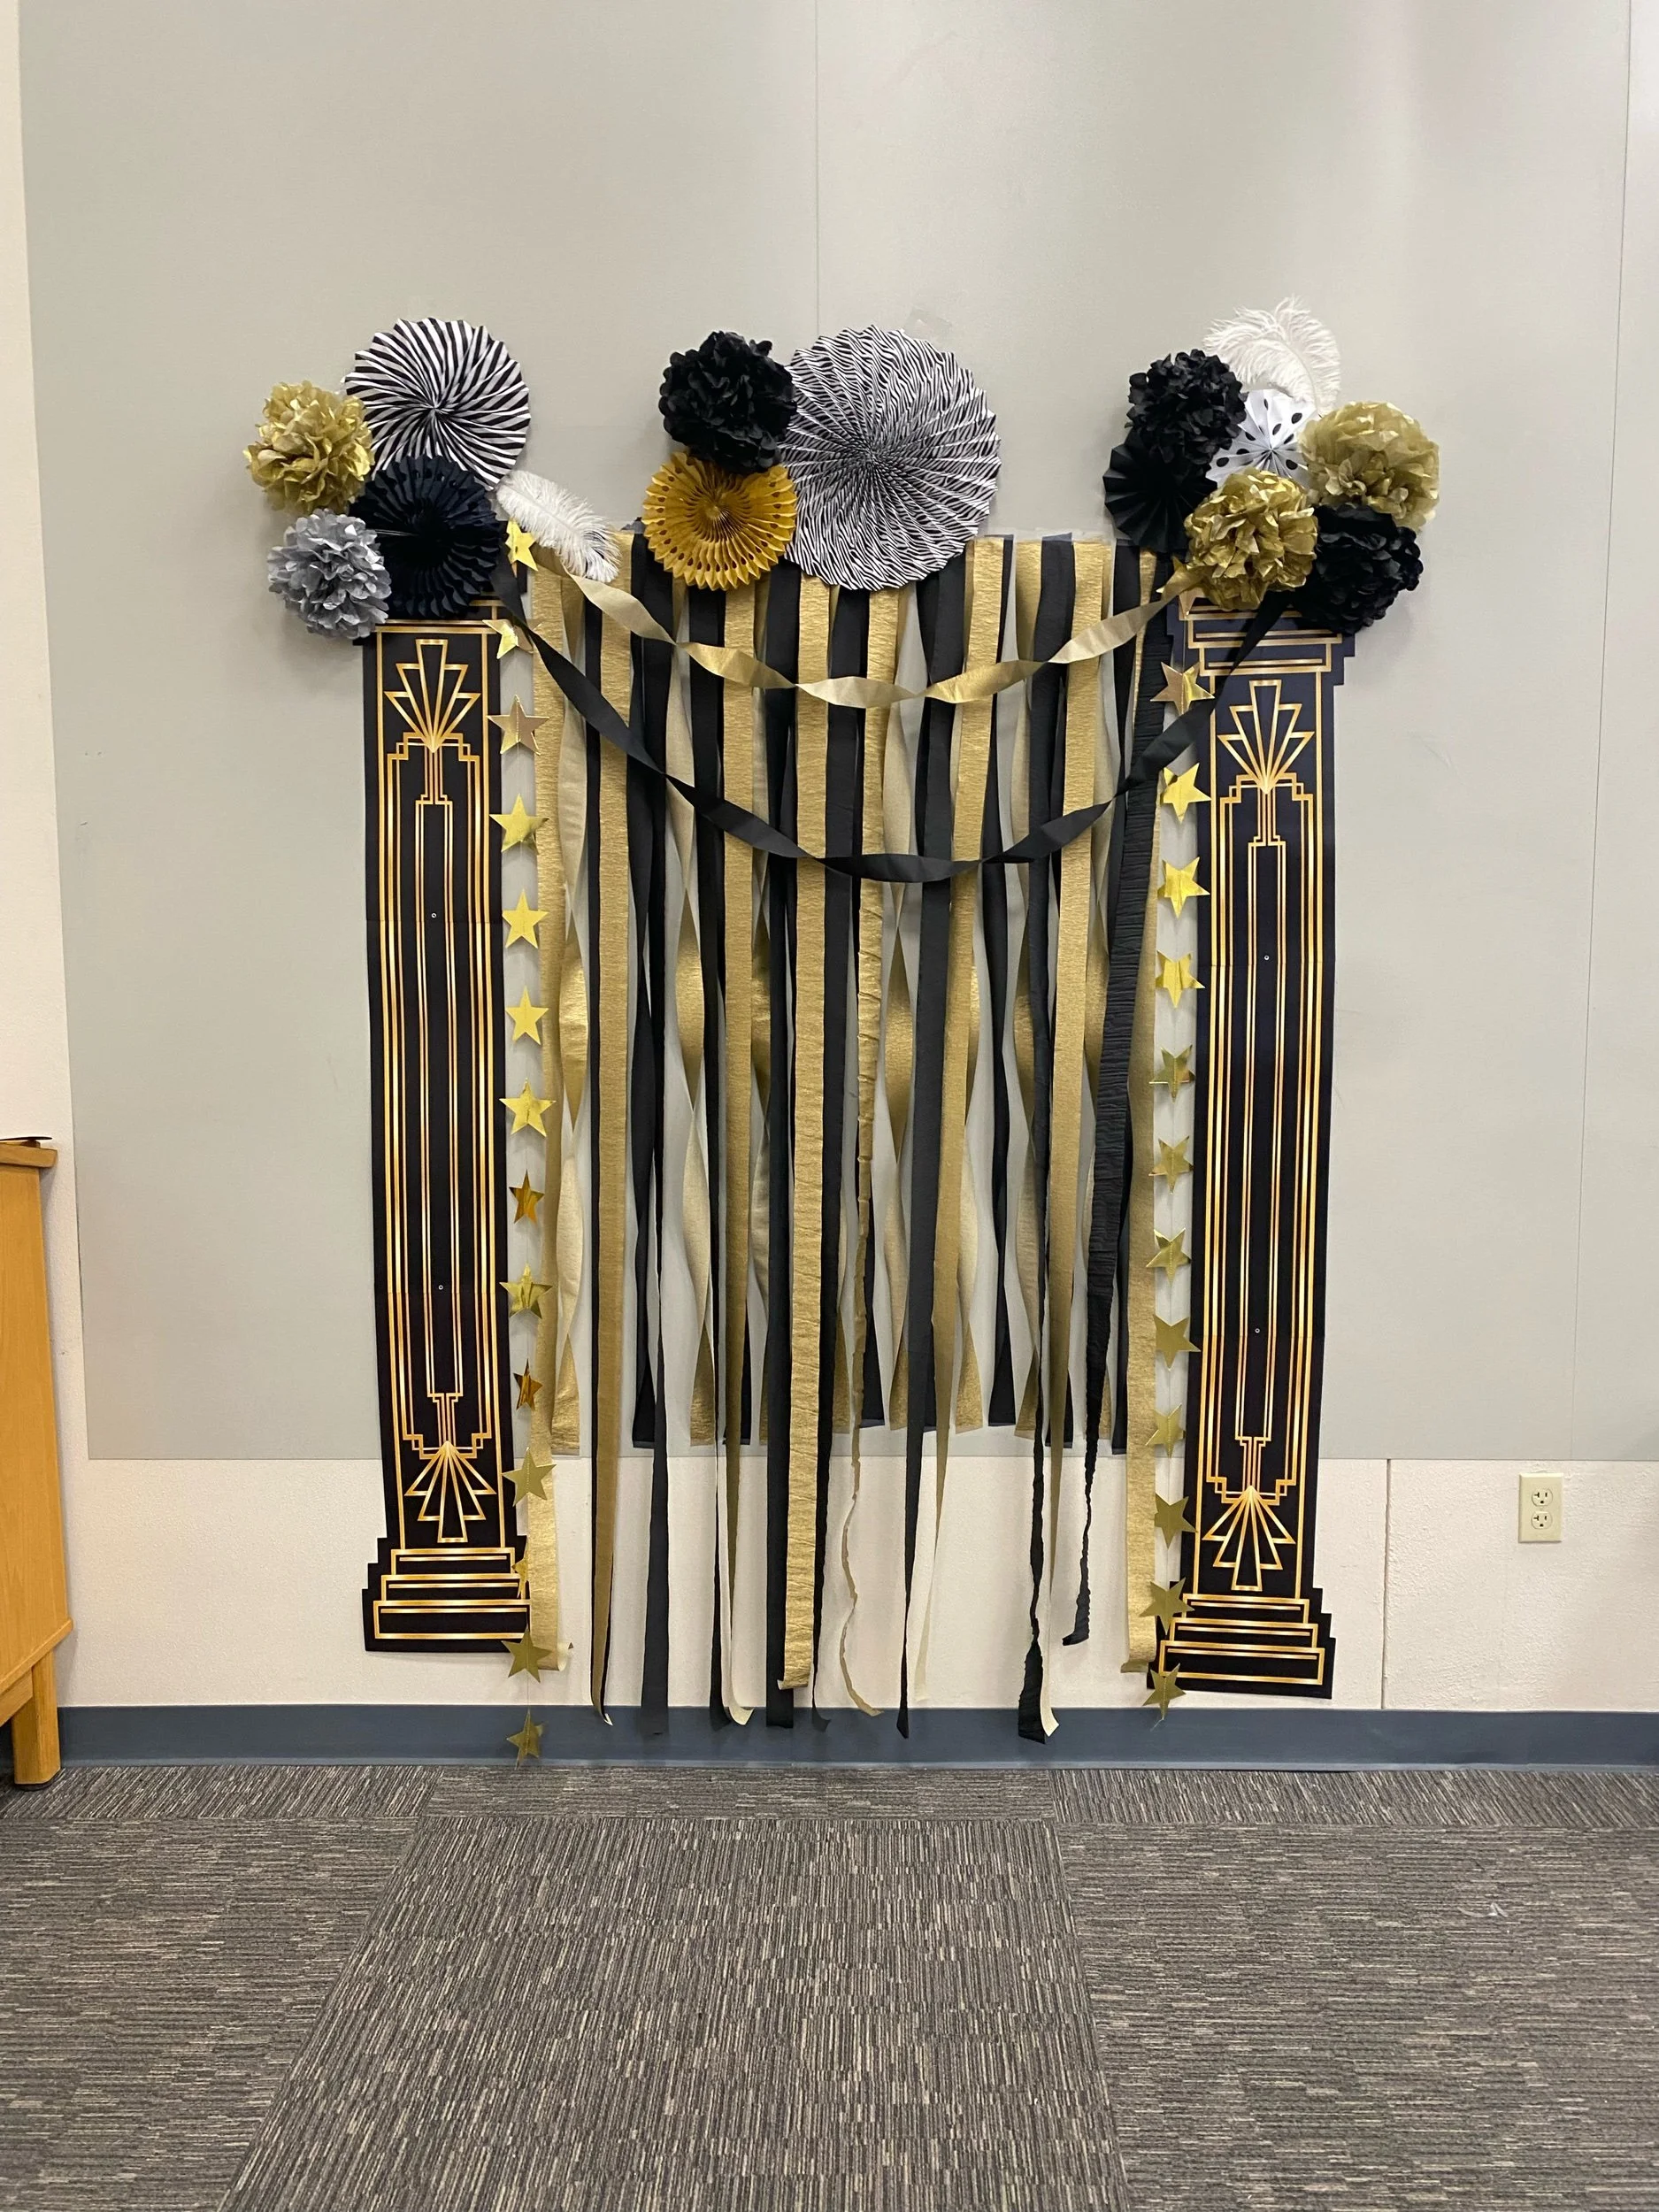
Photobooth Backdrops
I had some idea about what I wanted the photobook backdrops to look like. However, instead of planning it out, I laid out all of the materials we had donated (linked above and throughout this post), supplied a few rolls of tape and magnetic clips, and elicited the help of some of our students. I’m happy with what they created. The one foil fringe backdrop screams major 80s prom vibes.


Photobooth Props
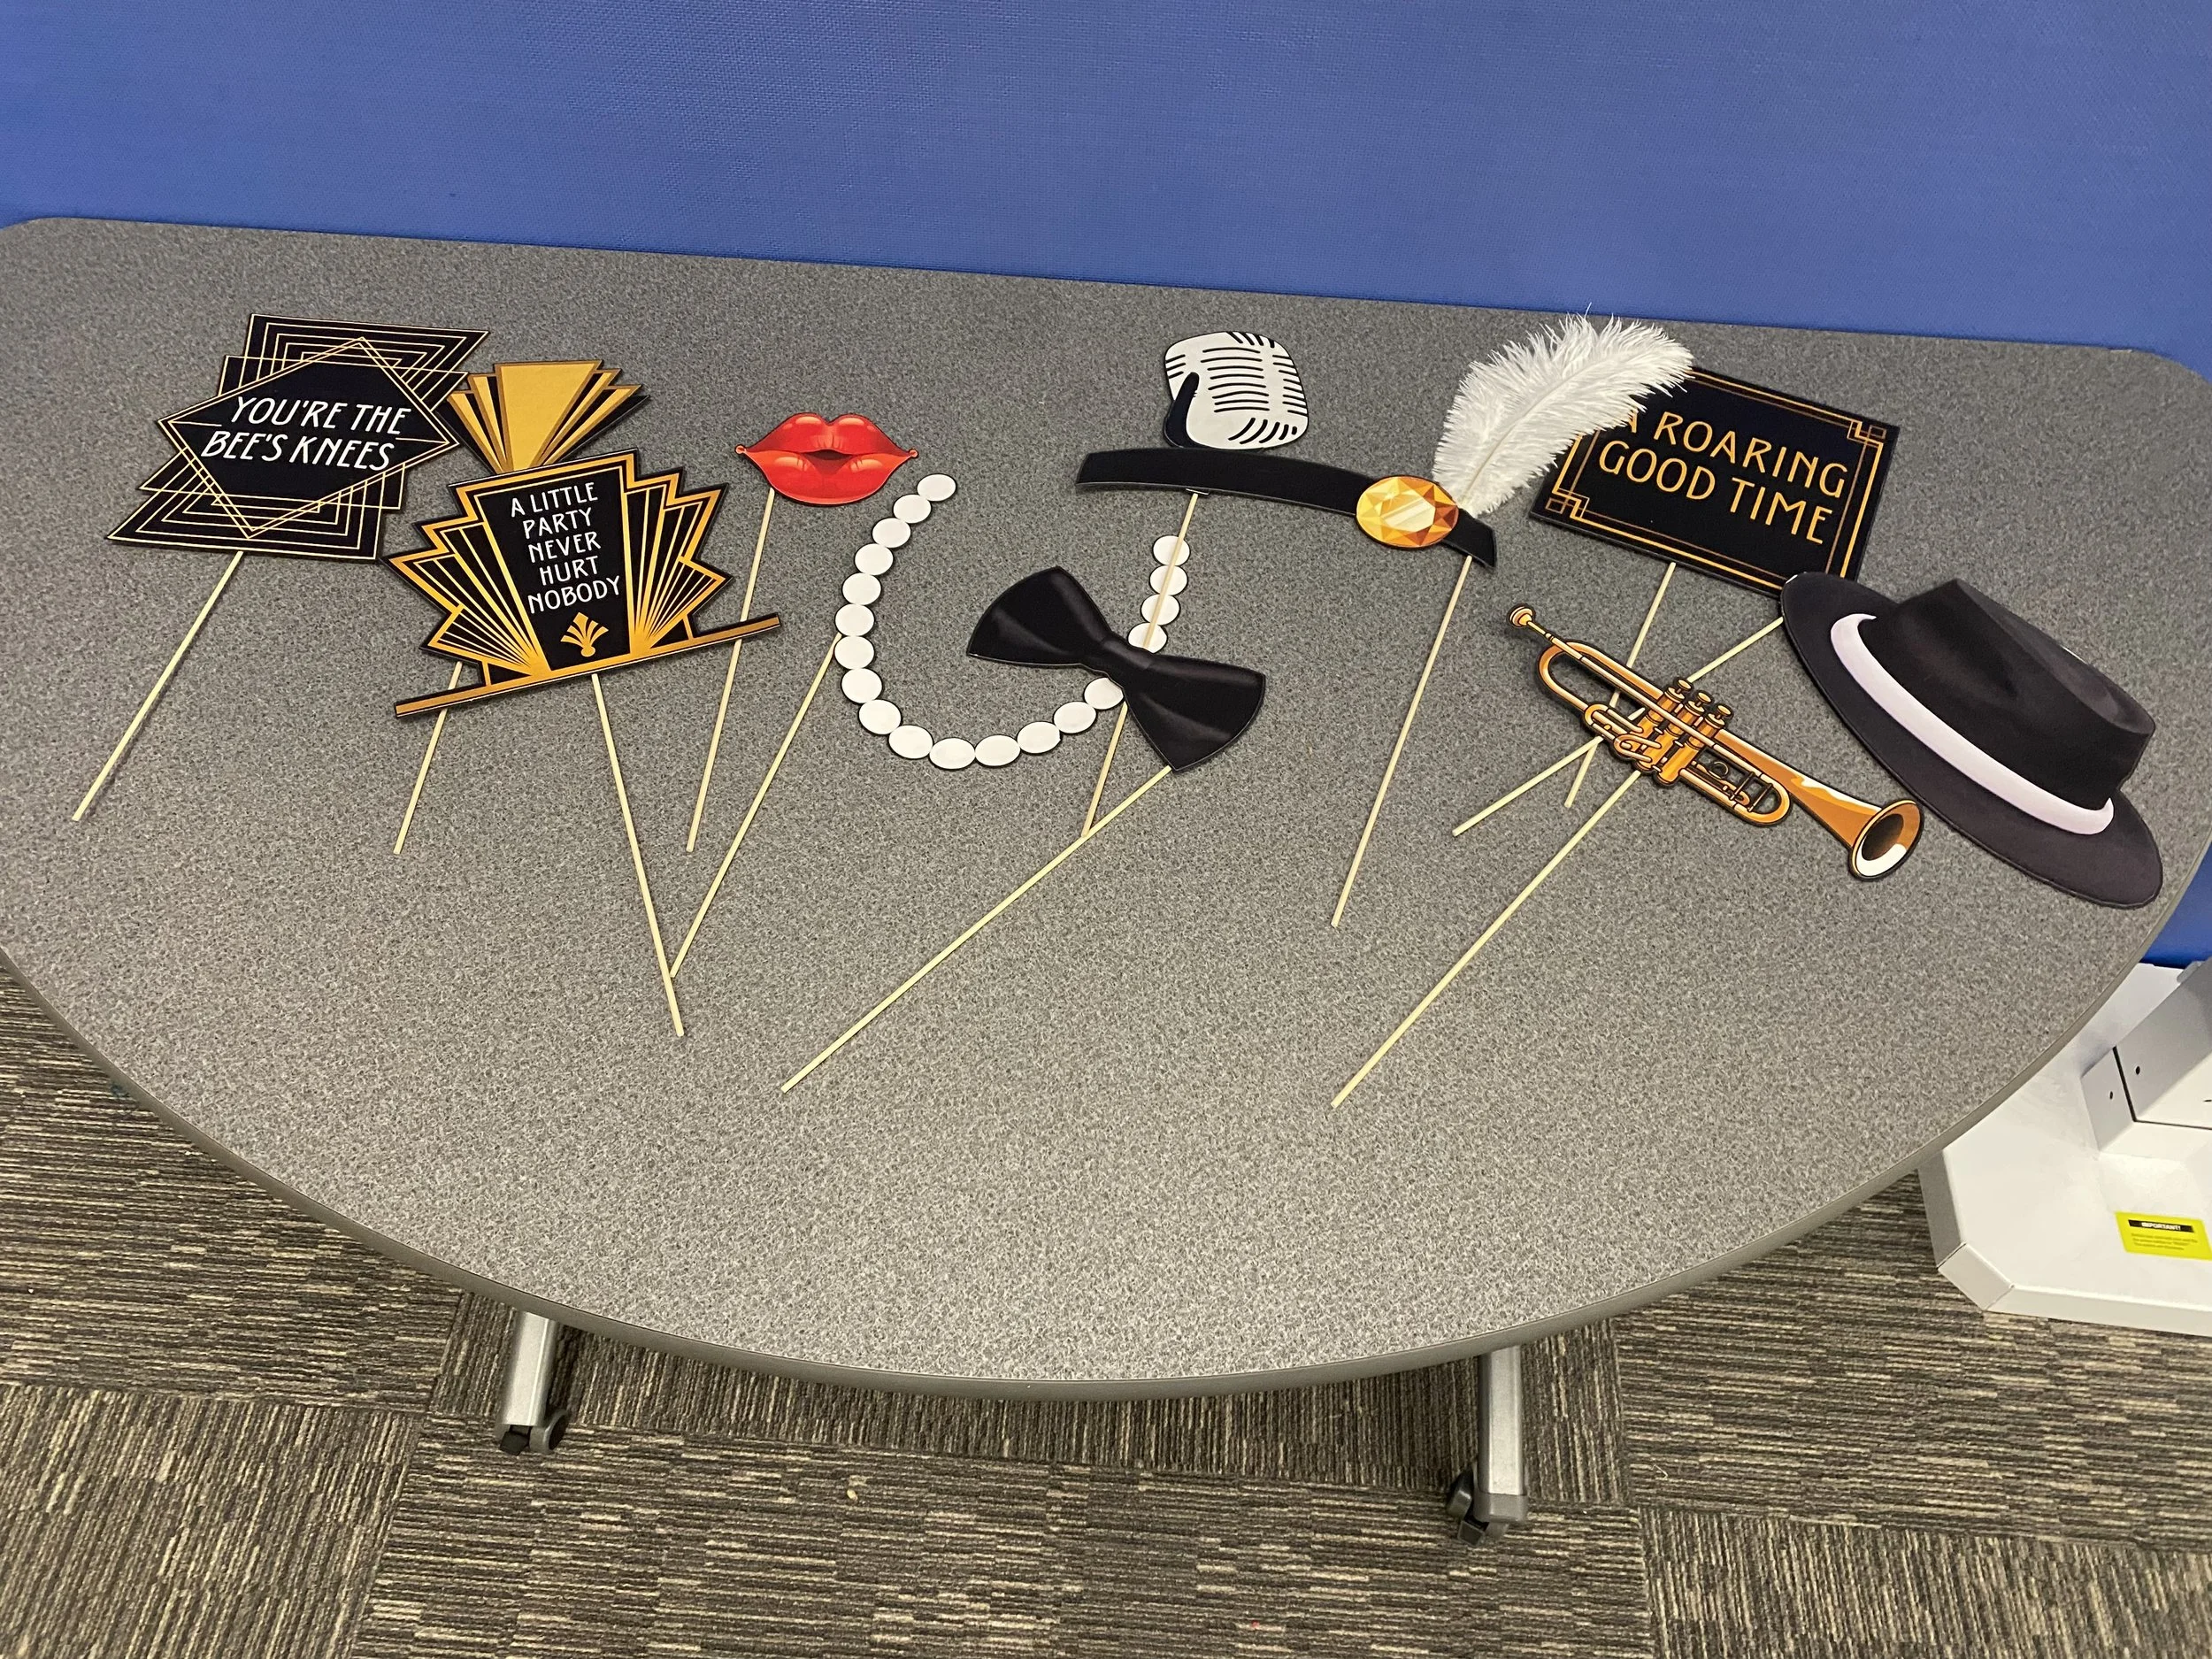
To make the photobooth props, I first started out in Canva and found Roaring 20s and Gatsby graphics that complimented each other. Then I found Art Deco frames and fonts to make the word signs: A Little Party Never Hurt Nobody, A Roaring Good Time, and You’re the Bee’s Knees. Then, I downloaded these from Canva and uploaded them into Cricut Design Space using the complex image setting and saving them as Print Then Cut files.
After I had the images on my project mat, I sized them and then used the offset feature to begin designing the cardstock that would give the pieces structure. Even though I only included 1 cardstock piece per image, I ended up cutting out two sets of the black offsets. Gluing together two pieces of cardstock and then adding the Print Then Cut image on top gave it enough structure to remain upright for the pictures.
The final step was using hot glue to secure these thin dowels to the backside of each piece. I added two ostrich feathers between the cardstock layers for the flapper headband props. I made one set with the rods on the left sides and another with the rods on the right side. I’m not sure why, I just thought alternating the sides would add variety to the pictures.
Here is the Cricut Design Space link for these Roaring 20s photobooth props.
Centerpieces and Other Decorations
DESIGNING THE CENTERPIECES
To make the centerpieces, I first started out in Canva and found Roaring 20s and Gatsby graphics that complimented each other. Then I found Art Deco frames and fonts to make the word signs: A Little Party Never Hurt Nobody, A Roaring Good Time, and You’re the Bee’s Knees. Then, I downloaded these from Canva and uploaded them into Cricut Design Space using the complex image setting and saving them as Print Then Cut files.
After I had the images on my project mat, I sized them and then used the offset feature to begin designing the cardstock that would give the centerpieces structure. These cardstock pieces would also hold the images and the tissue paper would be glued to the bottom of the pieces. After creating the offset, I changed the layer to a basic cut and then welded a rectangle to the bottom. I then used only smaller rectangle to slice a space on the bottom for the folded tissue paper to be secured.
Here is the Cricut Design Space link for these Gatsby centerpieces.


ASSEMBLING THE CENTERPIECES
While the cardstock and Print Then Cut images were being cut by the Cricut, I began counting out sheets of tissue paper (8 layers each), cutting the sheets in half (to make 2 centerpieces), and then fan folding the sheets together using 1 - 2 inch rows. After the tissue paper layers were folded together, I used hot glue to secure the end of a ribbon to the middle of the layer and then wrapped the ribbon around the whole thing pinching the middle like a bow. I then cut the ribbon from the roll, added a little hot glue and secured the end to the ribbon that had already been wrapped around the tissue paper. Then, I pinched the tissue paper and tried to flatten the layers back out within the bunched middle so that the layers could be fanned out and then separated on sheet of tissue paper at a time.
When I separated the layers of tissue paper, I only pulled up the top 5 layers. I left the bottom 3 layers alone to give the bottom of the centerpiece more structure. After the layers of tissue paper were fluffed, I separated the two sides down the middle (vertically) to expose the middle part wrapped in ribbon.
Before I could move on with the tissue paper, I had to finish the cuts from the Cricut. I glued 3 layers of cardstock together using school glue. When those dried, I used a thin line of school glue along the backside edges of the Print Then Cut images and carefully placed them on the layered cardstock. When these were dried I returned to the fluffed tissue paper pieces.
I secured the cardstock to the tissue paper by adding hot glue to the top of the ribbon and then holding the middle of the cardstock pieces in place for a minute or two to give the glue time to dry. When the middle held, I refluffed the top 5 layers and then used hot glue on the outer top corners of the rectangle bases. I pinched the nearest layers of fluffed tissue paper to complete the circle of tissue paper around the cardstock and hide the structure pieces not covered by the Print Then Cut images. I then used hot glue to attach the outer petals of the tissue paper to make the bottom rim of the structure seamless and sturdier. For some of the taller centerpieces, I did have to add a little hot glue just under the images and behind the tissue paper to keep the structure from leaning forwards or backwards.
Overall, I am happy with how they turned out and definitely believe 8 layers of tissue paper is better than the 10 layers I used in my first attempt at these for my son’s Harry Potter Birthday Party.


The Menu
Mini cupcakes
Brownie Bites
Shirley Temple mocktails (7 up, grenadine, cherries and ice)
I was worried that we weren’t going to have enough treats for all of the classes, but the students kept bringing in treats. We ended up with all kinds of cookies, cupcakes, cinnamon rolls, bruschetta, and a bunch of other random snacks. It made it more fun and kept the kids going back to the treat table to see what else had been contributed.


The Playlist
We began our day with this Spotify playlist - The Great Gatsby Collection. The shuffle and karoke features added to the entertainment. The students also enjoyed adding their own song requests to the queue. Overall, it was amazing to spend time celebrating literacy with the students.