How I Made Our 2023 Holiday Cards
Each year we make our holiday cards using Shutterfly and my Cricut. Here’s how we put together our 2023 holiday cards:

Planning the Photos
Every year, Shutterfly runs 50% off holiday cards AND free shipping promos. This year’s deadline was November 12th. This means, for us, the end of Halloween prompts us to schedule our photo shoot to get those holiday shots.
This year, we opted to just have the boys on our card. We’ve done full family shoots for the past 5 years and since we were limited on both funds and time, it was easier to keep it just to the boys. Brandon ended up taking them to the beach to snag the shots while I worked late.
Each year, we also choose a theme to coordinate outfits. Usually, we stick with fall colors. I especially like earthy tones. This year, we chose a festive, plaid vibe with alternating button downs and santa hats. Here are the links to the items we ordered:


Ordering the Cards
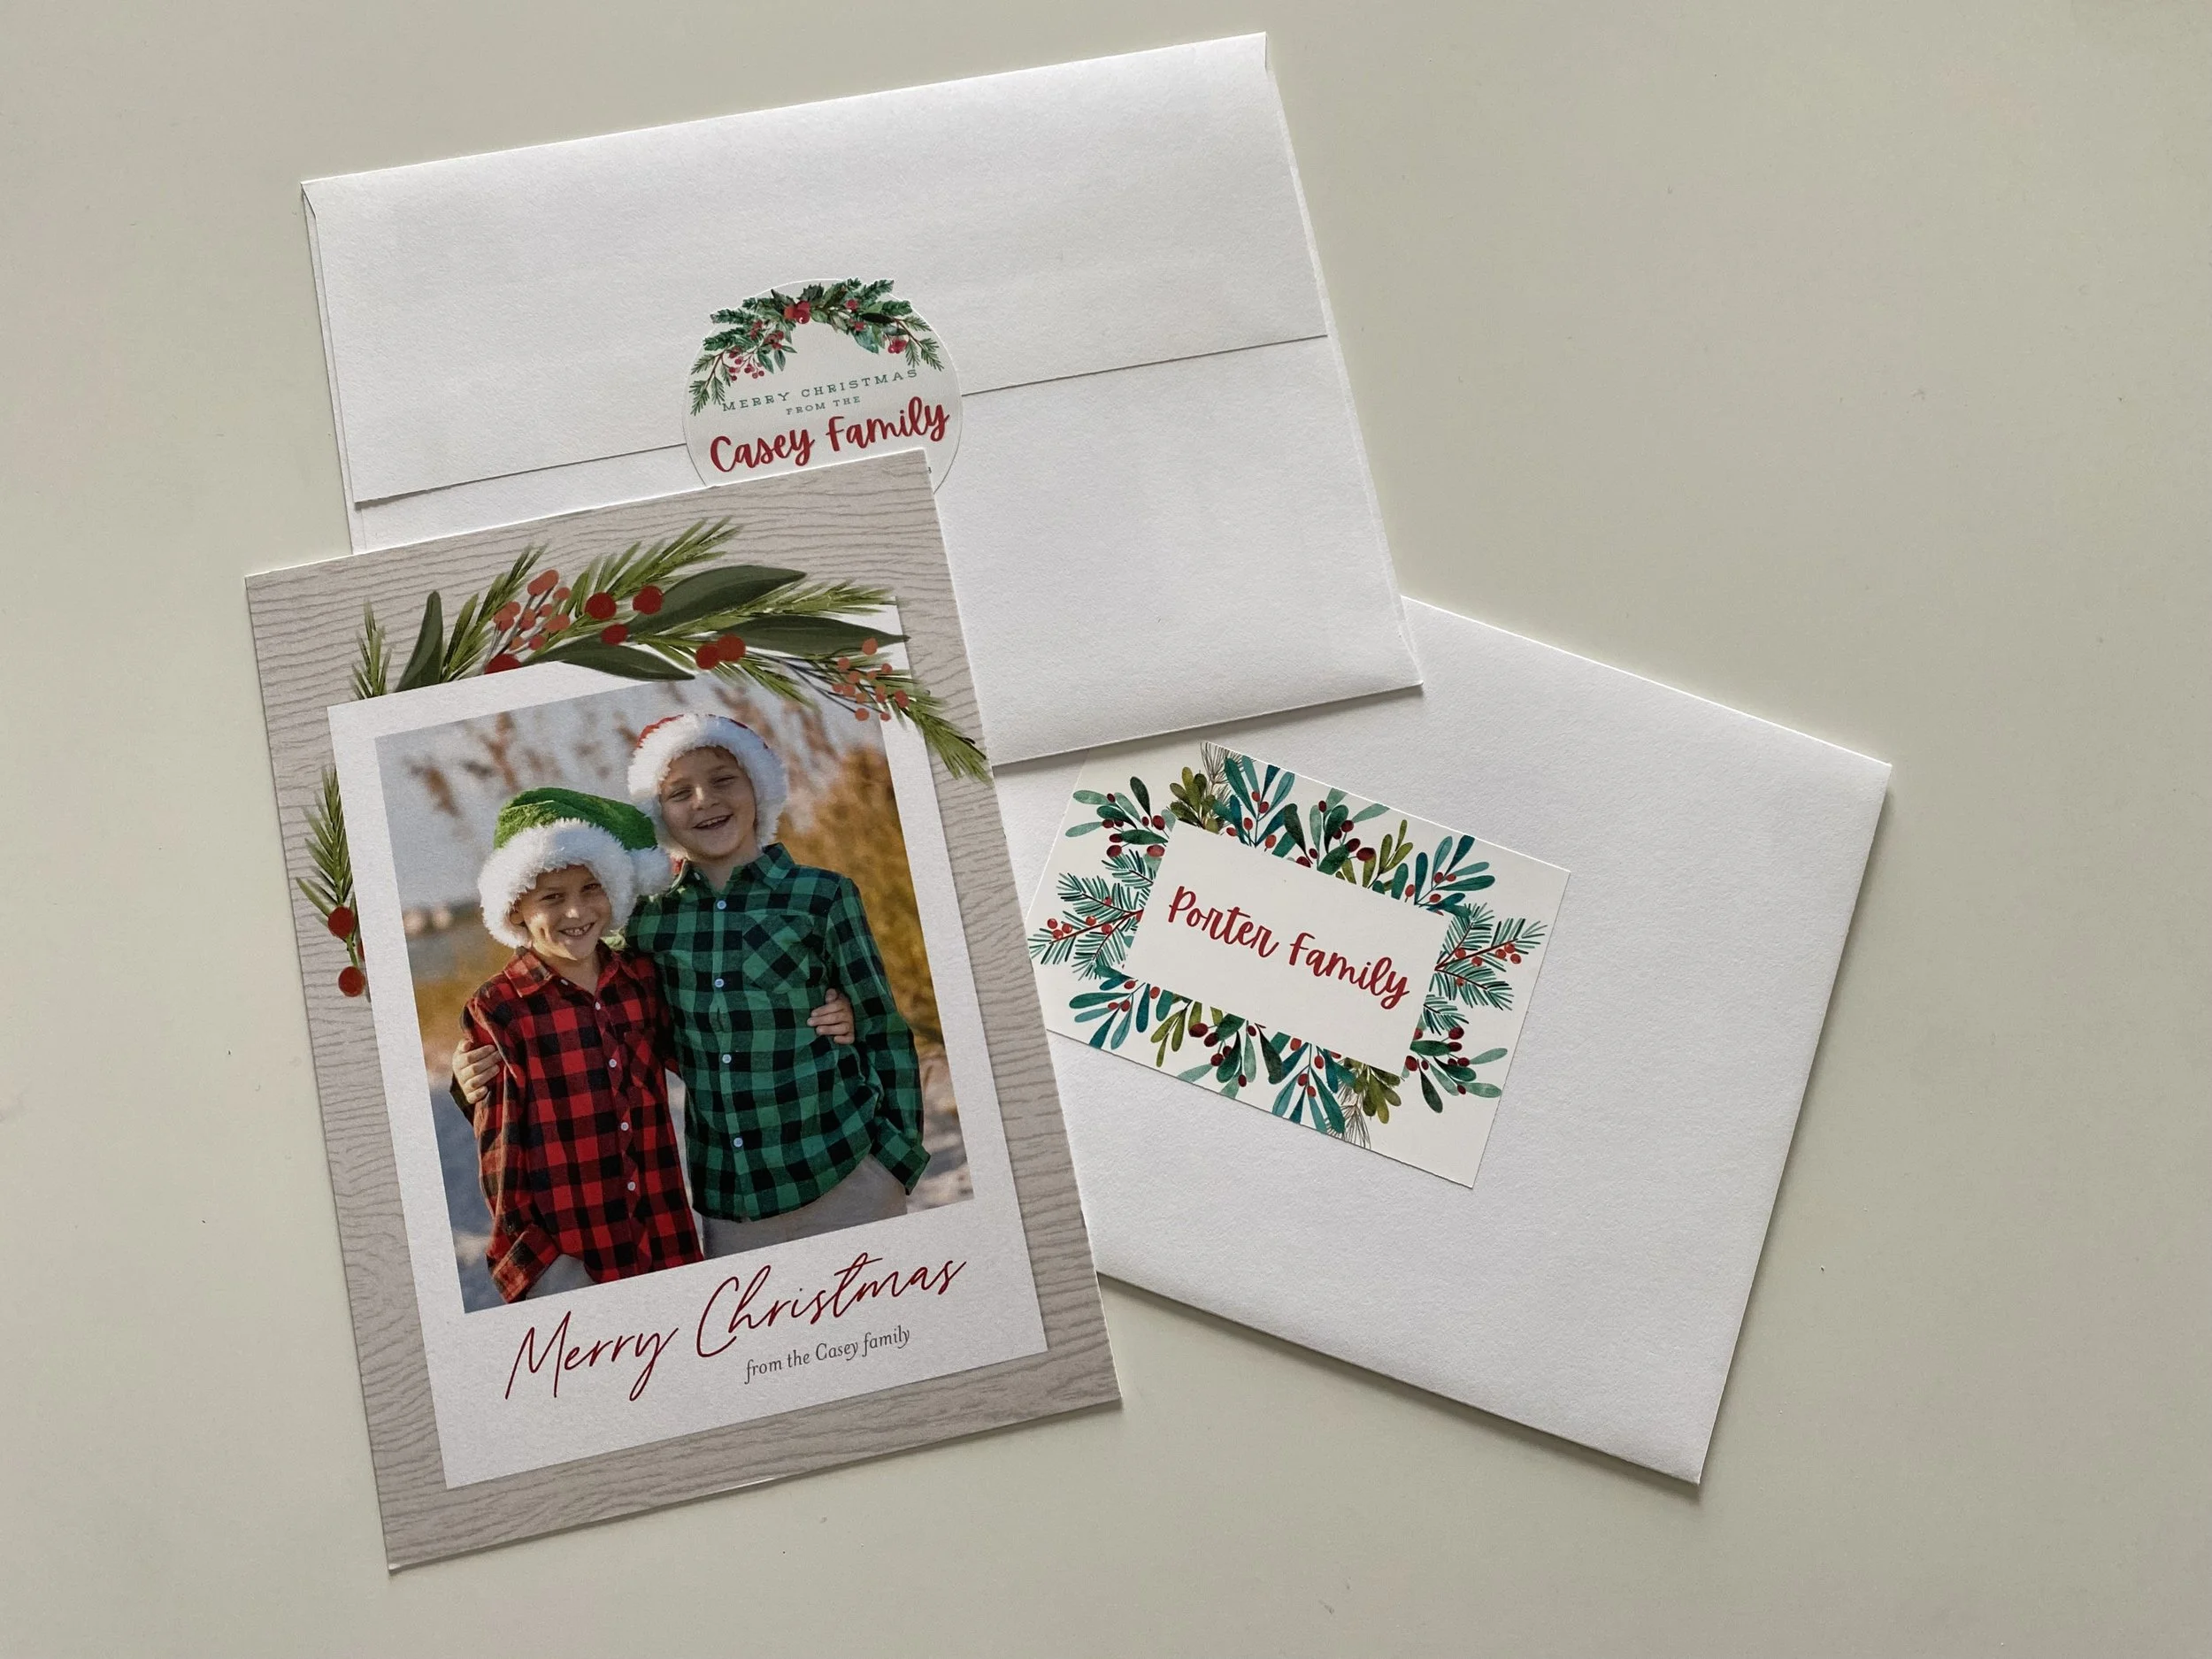
After getting the photos edited, I uploaded them to Shutterfly and chose this template: Headline Holly. You can personalize the front and back of the card, as well as the envelope. Some years, I have opted to use their service to address and send the envelopes to my address book. However, this year, I opted to make the address and return labels myself. It felt more personal and I like seeing what they look like before our family and friends receive them. My total order was $41.

Creating the Labels
Once I got the cards in the mail, I set out to create matching labels on Canva. I began with the address labels and searched for a Christmas template. I ended up finding and using the Red and Green Illustrated Merry Christmas Label by ArtBox Global. I deleted the Merry Christmas graphic and replaced it with the Apricots font in red. This line was used for the family names. Then, I added two more text boxes for the address and used the Carlsons Slab font. I think the fonts complement each other nicely.

After typing in the first family name and address and getting everything aligned nicely, I used the plus icon (duplicate page setting) to create another label and updated that one with the next name and address. I repeated this process until I had a label for each card I had ordered.
Here is the template link for the address labels. There is also a label with no address and the name centered for cards that will be given in person.
After I had all of the names and addresses entered, I downloaded the labels as PNGs (instead of PDFs) following these steps:
Click on the Share link in the top right-hand corner.
Scroll down and select Download.
Use the dropdown menu to change PDF Print to PNG.
Then, click the Download box at the bottom of the menu.
Your images will download in a zipped folder (most likely in your computer’s downloads folder - unless your settings have been changed to another location).
After, I downloaded the address labels, I decided to design the return labels. Since the address labels are so detailed, I decided to make round address labels to go on the backside of each envelope.
For the return labels, I used the Beige White Elegant Christmas Candle Product Circle Label by LuckPicture template. I moved the Soy Wax Candle textbook to above the title box and changed it to say Merry Christmas from the” using the same Carlsons Slab font from the address label. I then updated the title box for our family name and used the same red and Apricots font as the label. (I know the colors match, because you can click on the color in the first project and copy and paste the color code into the second project. This way I know the shades of red will not clash when printed. I did the same for my greens).
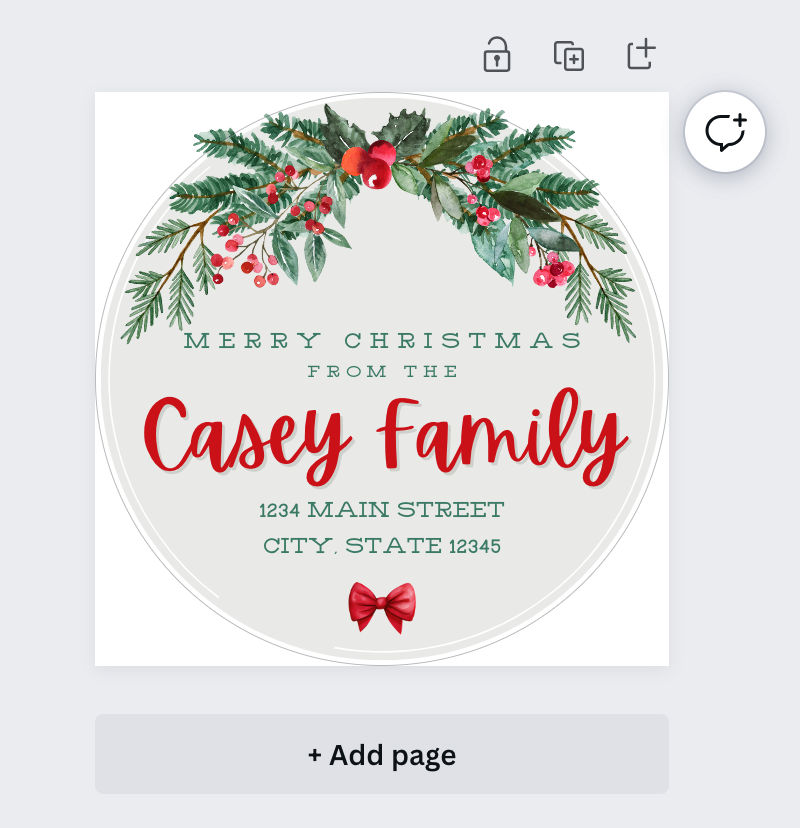
Next, I rotated the circle element and then updated the background with a greige color I thought would complement the design. Then, I found the centerpiece for the top of the label using Christmas wreath illustration. Watercolor green leaf and holly berry by Anna Kuzmina.
Since the wreath detail at the top didn’t come down the sides as much as I wanted, I added the Watercolor illustration christmas tree branch by Karina Martirosova, and then used the position tool to place it behind the wreath.
Finally, I added and resized the bow using Red Bow Watercolor Illustration by SPRESSO.
Here is the template link for the return labels.
Once I had our return label the way I wanted it, I used the following steps to export the image in preparation for the next step with my Cricut.
Click on the Share link in the top right-hand corner.
Scroll down and select Download.
Then, click the Download box at the bottom of the menu.
Your image will most likely in your computer’s downloads folder - unless your settings have been changed to another location.
Making the Labels
The next step was importing each label into Cricut’s Design Space to use the Print Then Cut feature to do just that.
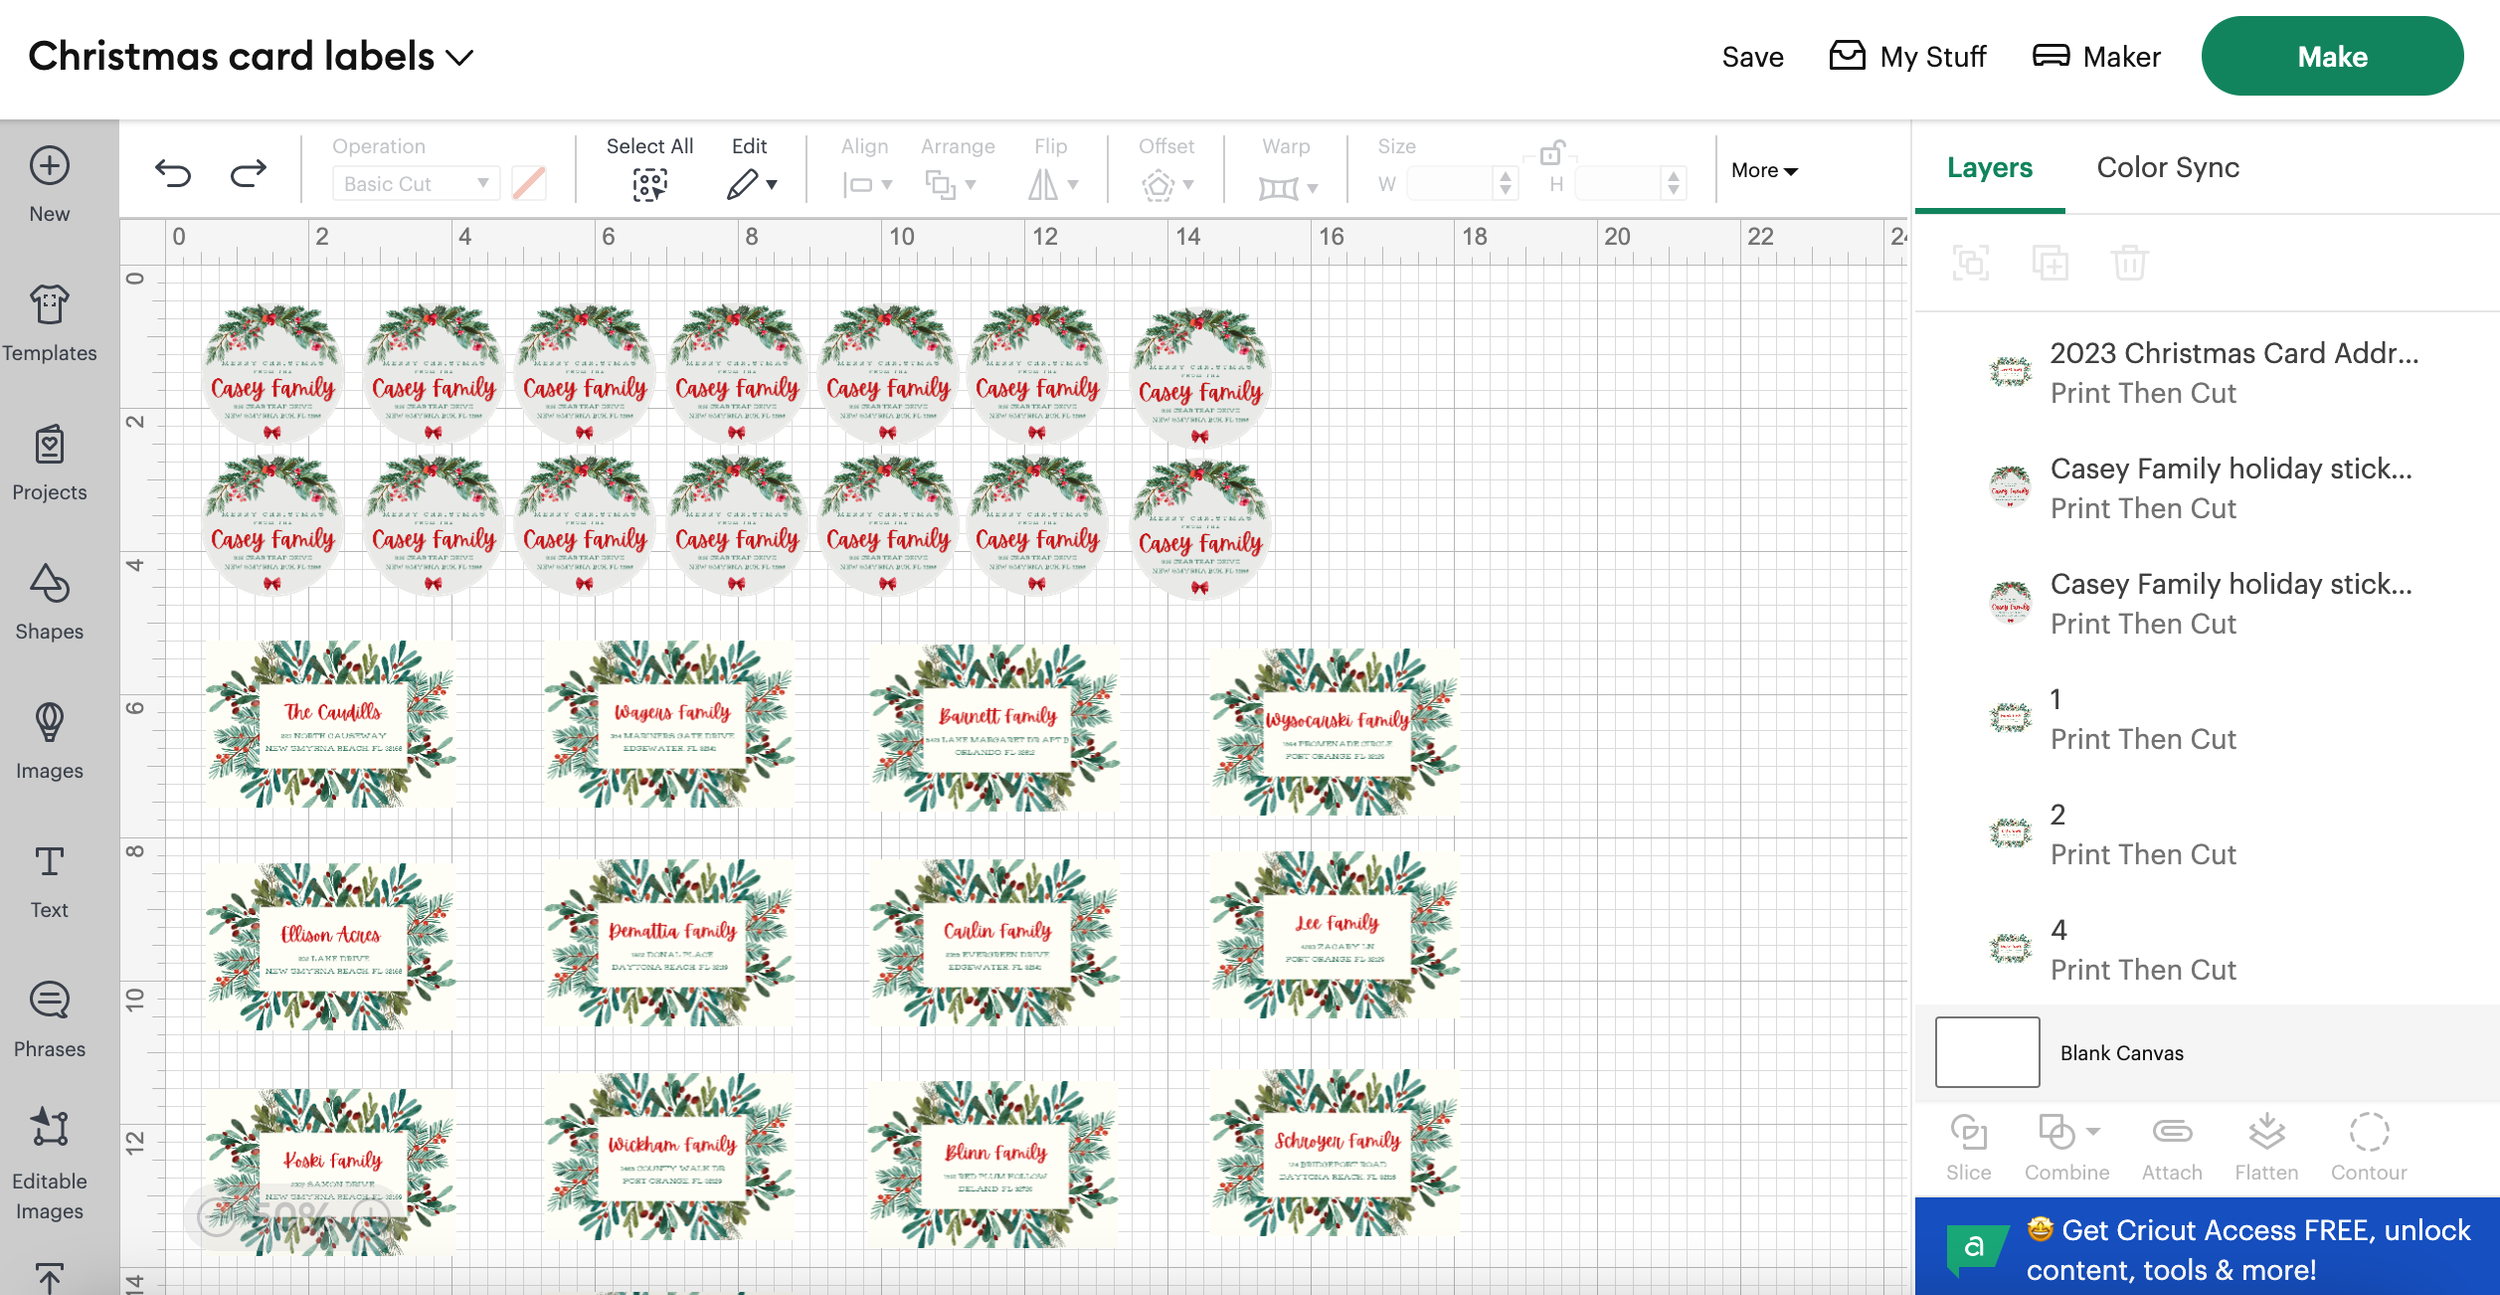
Importing the labels has to be done one at a time. Open Design Space and start a new project. Then use the upload button to select each file (Since Canva numbers each file in the zipped folder, I found it helpful to write the numbers down on a sticky note and cross each off as I uploaded them. You can also check to see which ones you’ve uploaded by clicking on the information icon in the top right-hand corner of each image to see the file names.) After selecting the image, I chose the Complex setting to maintain each label’s resolution and color vibrance. The next screen is for removing the background (which we don’t need to do for this project), so I clicked next and then selected “Print Then Cut” on the final screen. Repeat this process until each label, including the return label is uploaded. Then, I selected each image and added them to the project.
The next part is specific to the envelope size. Since my cards are 5” x 7”, I opted for address labels at 3.5” wide and return labels at 2” wide. This is done by selecting on each image individually and then changing the size by typing in the top menu. Make sure your Lock Proportions hasn’t been disabled.
Once each of the images is the appropriate size, I saved the project and then click the Make button in the top right-hand corner.
Print Then Cut
To make the labels, I used my HP Envy 4500 series printer and these premium sticker sheets. I sent each mat design to the printer with the Add Bleed option turned on. I used the clear mat film over each printed sheet and the scraper tool to gently stick each sheet to the cutting mat. To cut the stickers out, I used the Sticker Paper, Removable setting.
After each sheet was cut, I stuffed the envelopes with the cards, placed an address label on the front and then placed the return labels on the back. I’m thrilled with the colors and design. It’s a happy piece of mail and I can’t wait for our friends and family to receive them.