
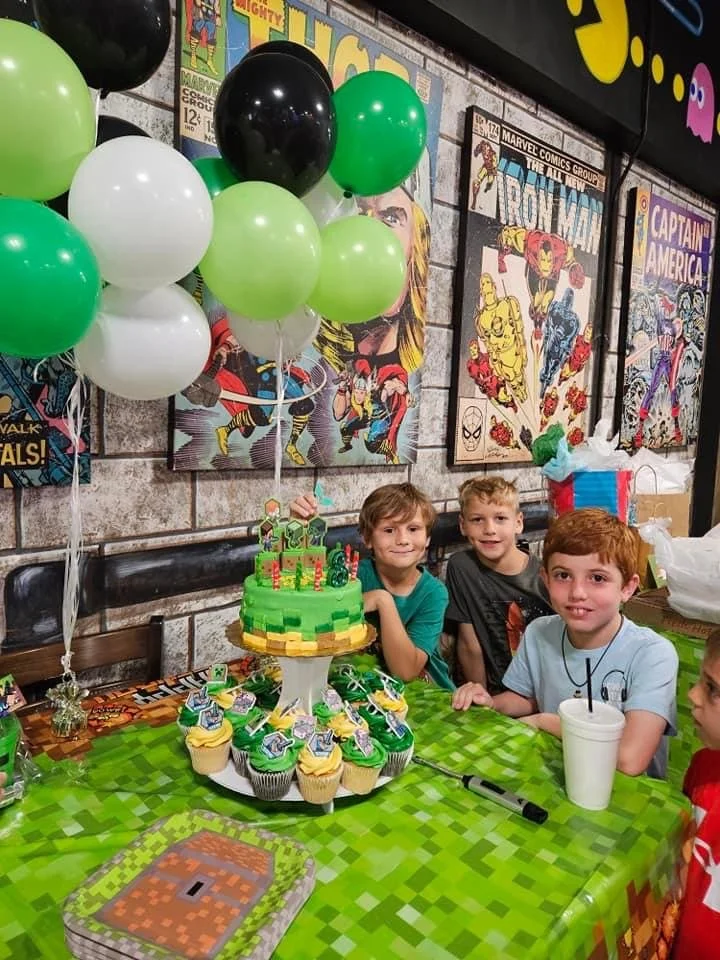
Minecraft Birthday

When a close friend reached out and asked if I had any Minecraft decorations, I knew right away I wanted nothing more than to love on her son like one of my own. We had a great time putting these details together. The craft/play date we had to finalize all of the items for his party was my favorite. Here’s what we planned and how we made it…

Decorations
Here is a list of the items I purchased from Amazon. I made the rest of the decorations. Steps and details are provided below.

Banner


Print the design on sticker paper enabling the bleed option and allow the ink to sit for a few minutes to dry. Be very careful with the printed design, especially if you got the glossy option. Glossy looks more vibrant and professional, but it smudges easily. Since there were so many pages to print, I numbered them in the bottom right corner when they came out of the printer so it would be easier to keep them organized.
Cut the holographic vinyl down to fit inside the registration marks. I do this by turning the vinyl over, lining it up within the registration marks, and then using a pen or pencil to mark where the cuts should be. Then, I use a paper cutter to create straight edges.
Laminate the sheet with holographic vinyl. I do this by removing the back from one corner and then cutting off a small triangle. I line up the corner without the back and press it down. Then, I remove the rest of the back and use a ruler to smooth the vinyl over the sticker sheet. This takes practice and patience. I found it easier to prioritize getting the top edge (when cutting the top right corner) placed first and then holding the top of the sheet steady while sliding the ruler down the sheet.
Next, place the sticker sheet with uncovered registration marks on a sticky mat, place the mat in the Cricut, and cut. I added a custom cut setting for these laminated sheets. I still use a fine point blade, but I set the pressure to 250 and saved it for future use.
The next step is to cut out the sheets of cardstock. I used this medium black cardstock. I find it cuts better with the glossier side facing up. I use the medium/80 lb cardstock setting with Pressure dropdown changed to More, but only if the mat is sticky enough to really hold the paper in place. Otherwise the blade will drag and tear the design. The setting change is most likely not necessary if you are using a brand new blade. The slower, more careful you are when removing the cardstock from the mat after the cut has finished, the less debris you’ll have on the edges.
Remove each sticker and carefully smooth it out onto the matching cardstock piece.
After each piece of cardstock has it’s laminated sticker on top, layout out the pieces in the correct order.
Then, adhere each letter, character, and animal to the block pieces using foam dots (creates a neat 3D effect).
When all the pieces are adhered to the blocks, warm up your hot glue gun and stack the blocks with the first piece on the the bottom and the last piece on the top. You’ll glue the back of each piece, so you’ll need to work from the end of the design to the beginning letters to keep them in order and legible.
Working backwards, apply a dot of hot glue in the top left hand corner of the block and press the ribbon in creating a loop to be used for haning. Then, put a line of hotglue across the top of the block and press the ribbon into the glue. I like to cut out pieces of cardstock to apply over the hot glue to give more durability for hanging. Press the cardstock piece into the glue while hot.
Place the next block face down and space it a finger width or two from the first block. The closer you glue the pieces together, the more narrow your banner will be. The farther apart, the more space you’ll need to hang it. Either way, make sure you space the pieces equally along the ribbon.
After the last piece. Loop and cut the ribbon before pressing it into the hot glue in the top right hand corner of the first piece.


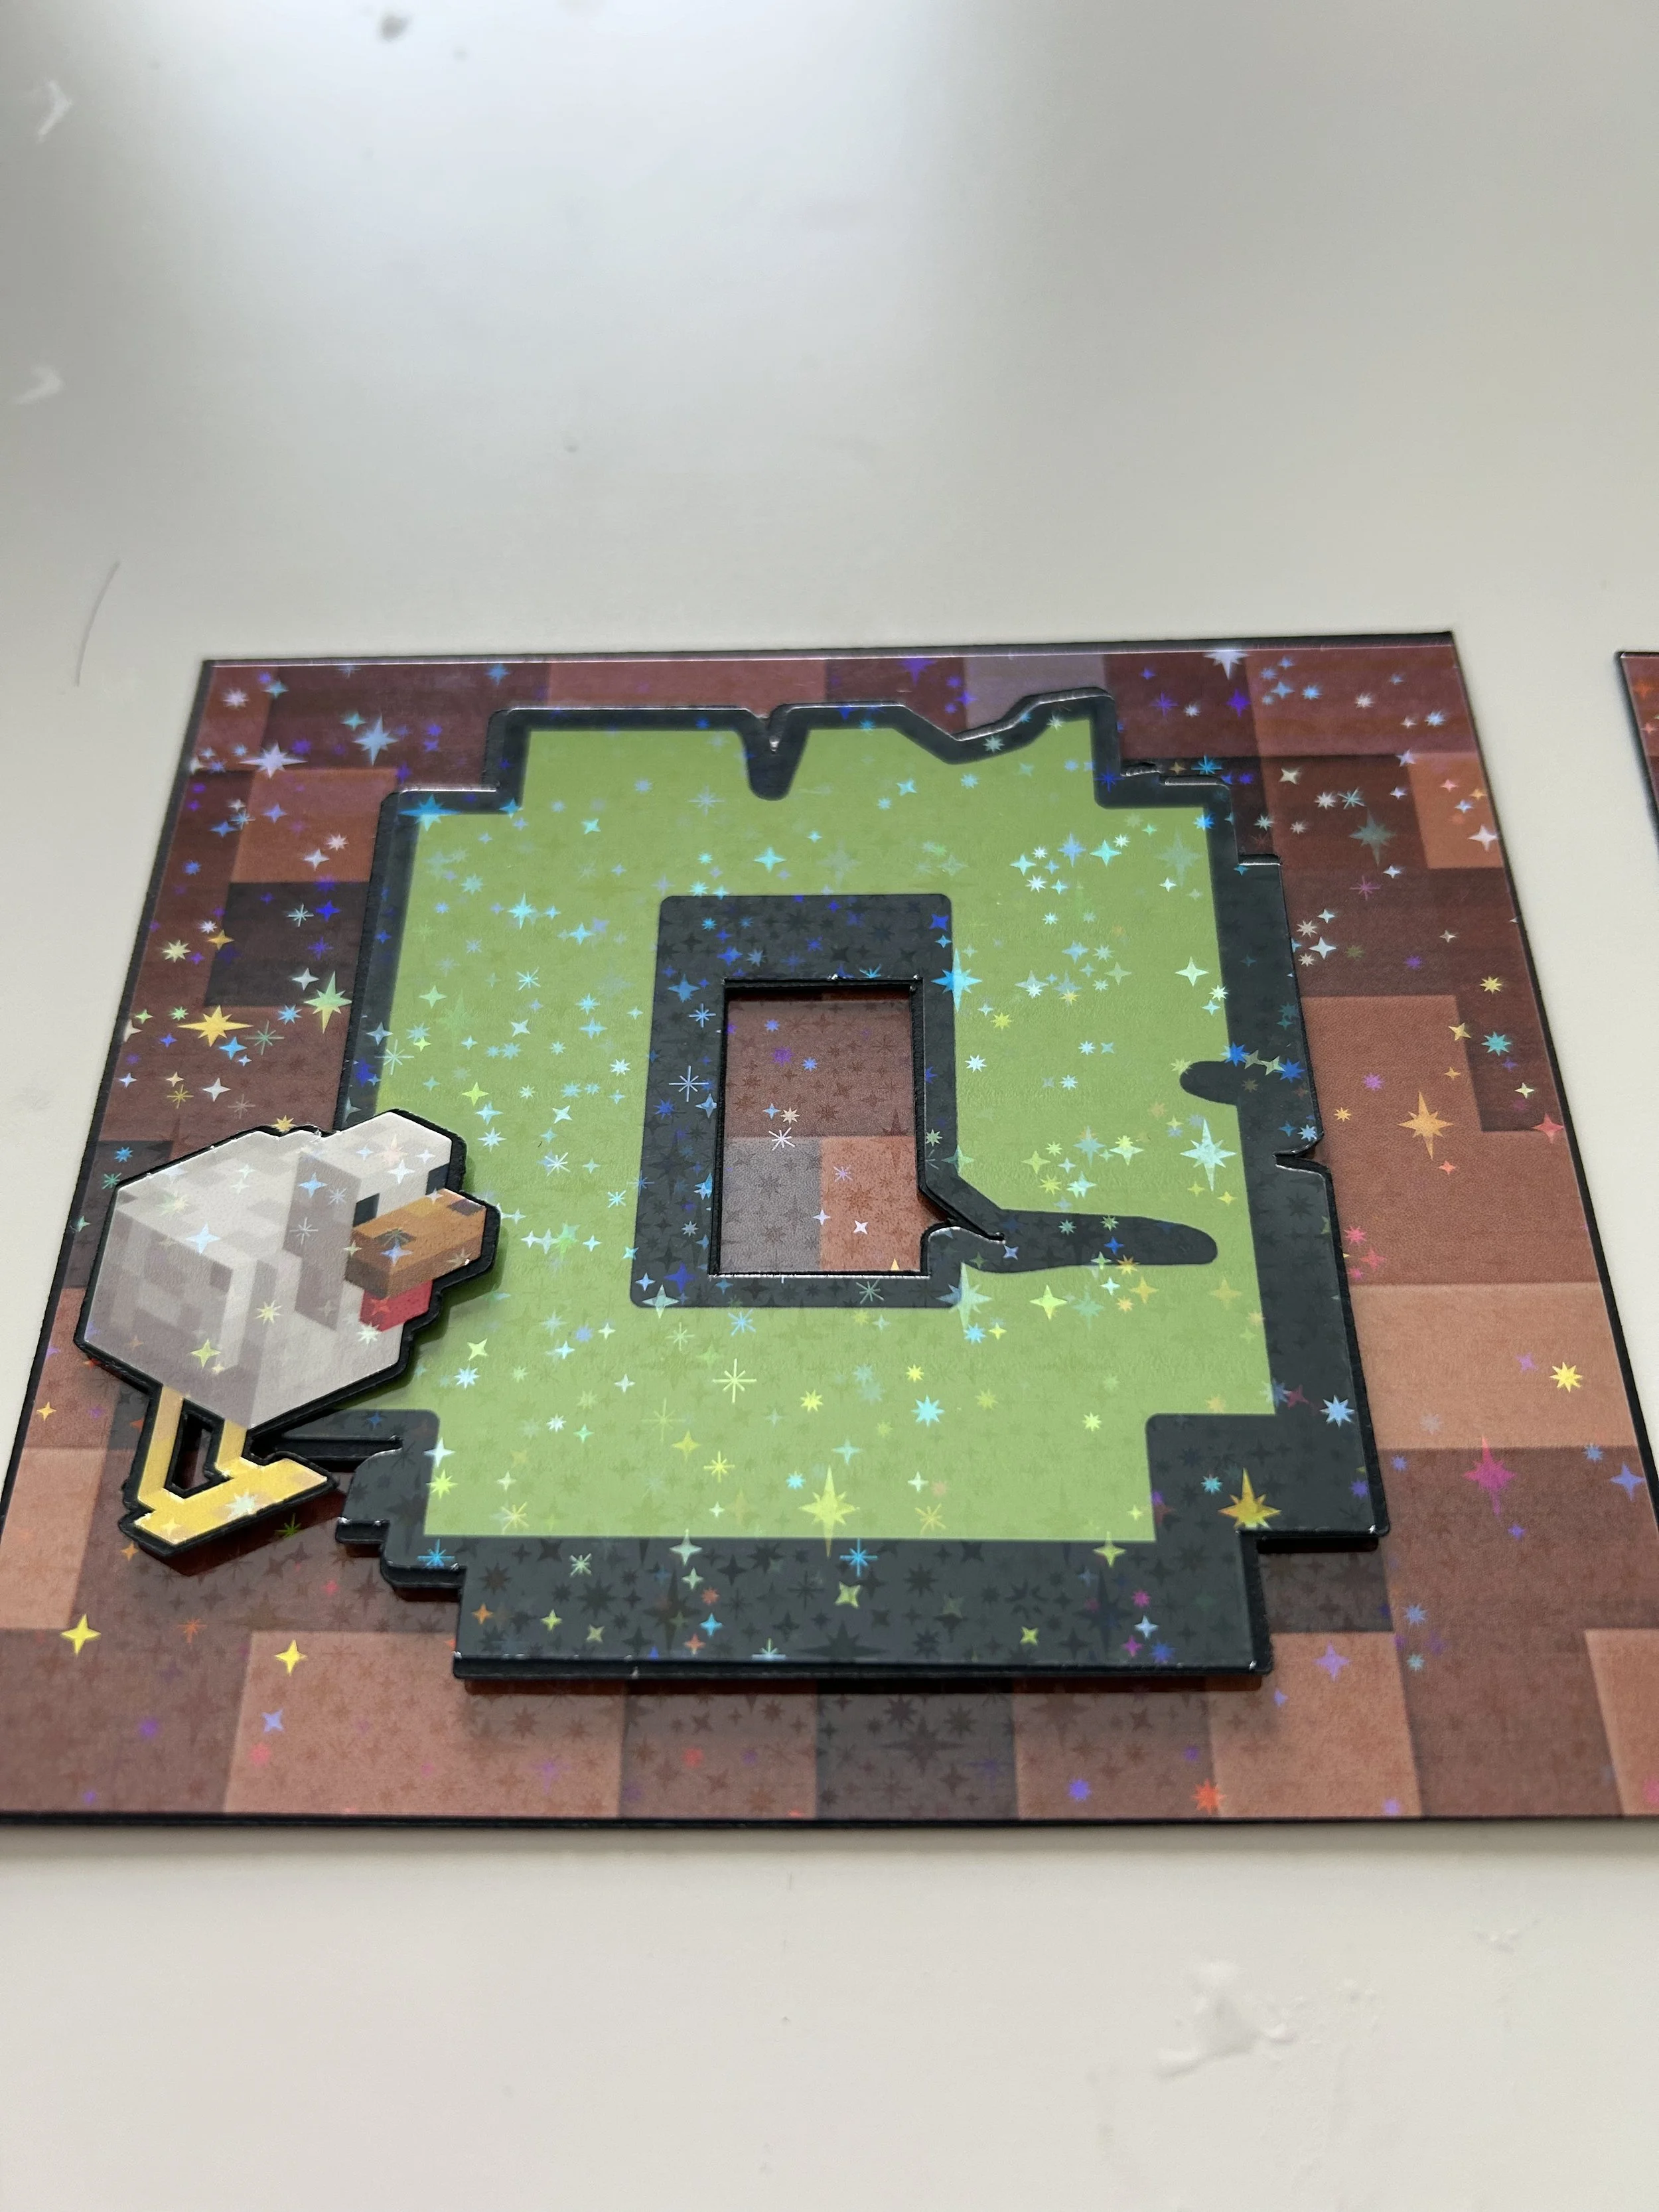
Centerpieces
Cricut Design Space Link for centerpieces
*Steps 1 - 5 are the same as the directions for the banner.
Print the design on sticker paper enabling the bleed option and allow the ink to sit for a few minutes to dry. Be very careful with the printed design, especially if you got the glossy option. Glossy looks more vibrant and professional, but it smudges easily.
Cut the holographic vinyl down to fit inside the registration marks. I do this by turning the vinyl over, lining it up within the registration marks, and then using a pen or pencil to mark where the cuts should be. Then, I use a paper cutter to create straight edges.
Laminate the sheet with holographic vinyl. I do this by removing the back from one corner and then cutting off a small triangle. I line up the corner without the back and press it down. Then, I remove the rest of the back and use a ruler to smooth the vinyl over the sticker sheet. This takes practice and patience. I found it easier to prioritize getting the top edge (when cutting the top right corner) placed first and then holding the top of the sheet steady while sliding the ruler down the sheet.
Next, place the sticker sheet with uncovered registration marks on a sticky mat, place the mat in the Cricut, and cut. I added a custom cut setting for these laminated sheets. I still use a fine point blade, but I set the pressure to 250 and saved it for future use.
The next step is to cut out the sheets of cardstock. I used this medium black cardstock. I find it cuts better with the glossier side facing up. I use the medium/80 lb cardstock setting with Pressure dropdown changed to More, but only if the mat is sticky enough to really hold the paper in place. Otherwise the blade will drag and tear the design. The setting change is most likely not necessary if you are using a brand new blade. The slower, more careful you are when removing the cardstock from the mat after the cut has finished, the less debris you’ll have on the edges.
Then, using school glue, adhere the layers together. Pay close attention to the edges and make sure they are lined up seamlessly and pressed tightly together. Allow the layers of cardstock to dry while you work with the tissue paper. Once dried, add the stickers to the layered cardstock.
Cut 6 sheets of tissue paper in half horizontally. Each half will be one centerpiece. If you are using different colored tissue paper for each centerpiece, as I have done, put 1/2 of the tissue aside for another project.
Keeping the 6 sheets together, fan fold the tissue paper lengthwise into 1/2 to 1 inch strips. Then secure a piece of ribbon around the middle using hot glue and trim the edges by rounding them with scissors.
On one side of the ribbon, fan out the layers and fluff up piece of tissue paper up at a time.
Secure the cardstock character to the middle ribbon using hot glue.
Fluff up the other side of the tissue paper one layer at a time.
Place a line of hot glue on the cardstock base making sure there is hot glue on each side of the cardstock. Then, pinch the tissue paper into the glue to keep it from showing the base. Repeat on the other side of the character.
Fluff the tissue paper so it looks even until you reach a desired look.

Menu cards
Canva template link to customize with own menu
Cricut Design Space Link for the designated menu as listed below
*Steps 1 - 5 are the same as the directions for the centerpieces.

Print the design on sticker paper enabling the bleed option and allow the ink to sit for a few minutes to dry. Be very careful with the printed design, especially if you got the glossy option. Glossy looks more vibrant and professional, but it smudges easily.
Cut the holographic vinyl down to fit inside the registration marks. I do this by turning the vinyl over, lining it up within the registration marks, and then using a pen or pencil to mark where the cuts should be. Then, I use a paper cutter to create straight edges.
3. Laminate the sheet with holographic vinyl. I do this by removing the back from one corner and then cutting off a small triangle. I line up the corner without the back and press it down. Then, I remove the rest of the back and use a ruler to smooth the vinyl over the sticker sheet. This takes practice and patience. I found it easier to prioritize getting the top edge (when cutting the top right corner) placed first and then holding the top of the sheet steady while sliding the ruler down the sheet.
4. Next, place the sticker sheet with uncovered registration marks on a sticky mat, place the mat in the Cricut, and cut. I added a custom cut setting for these laminated sheets. I still use a fine point blade, but I set the pressure to 250 and saved it for future use.

5. The next step is to cut out the sheets of cardstock. I used this medium black cardstock. I find it cuts better with the glossier side facing up. I use the medium/80 lb cardstock setting with Pressure dropdown changed to More, but only if the mat is sticky enough to really hold the paper in place. Otherwise the blade will drag and tear the design. The setting change is most likely not necessary if you are using a brand new blade. The slower, more careful you are when removing the cardstock from the mat after the cut has finished, the less debris you’ll have on the edges.
6. Fold each cardstock piece in half horizontally so you have a midline crease to line up the holographic sticker with. Then, apply the stickers to each piece of cardstock. You may need to store the stickers folder up and under an onject to encourage them to keep their form and stay upright like a table tent.
Menu
Cooked Chicken (provided by venue)
Pizza (provided by venue)
Trapdoors - pretzel squares
Lava - colby jack cheese blocks
Redstone dust - sliced strawberries

Cake


Favors


gold bars and silver bars (Hershey chocolate nuggets)
Cricut Design link for cup vinyl
Minecrafter by Madpixel Designs from Dafont
Cricut Design link for tags (Follow the same steps as listed above for the menu cards - with the exception of folding the cardstock in half.)
Ribbon


